Save It
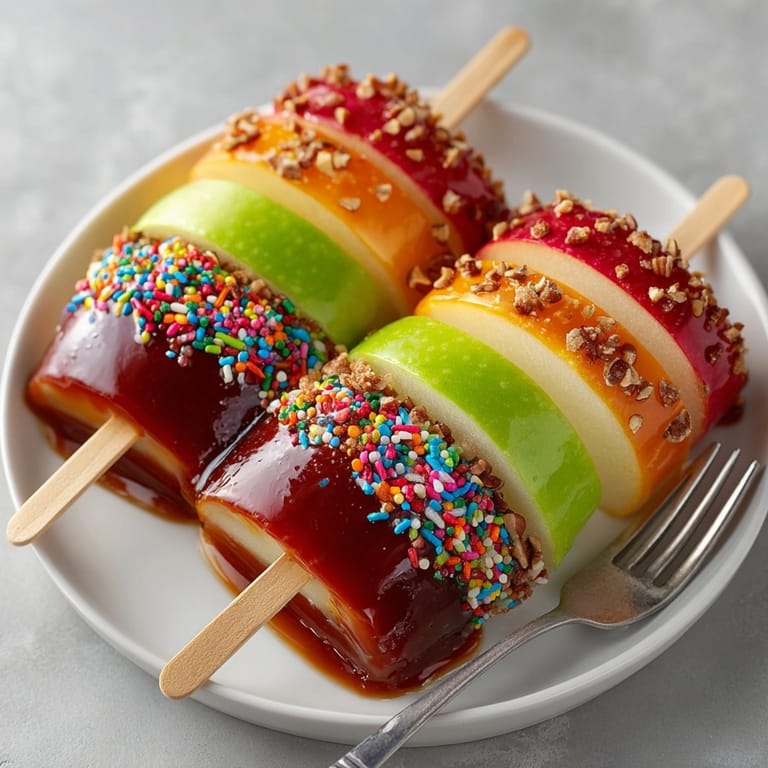
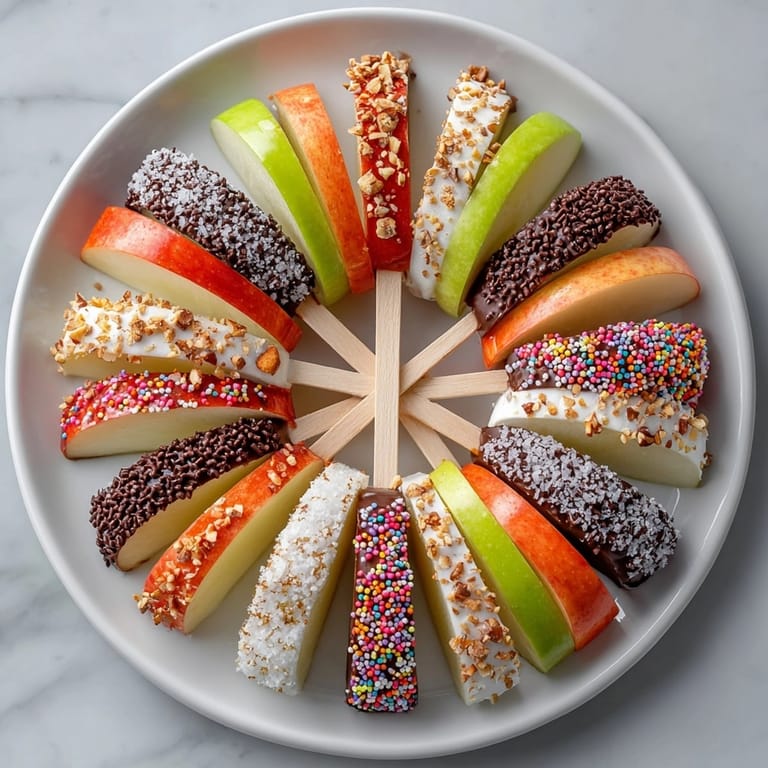
 These Trick-or-Treat Candy Apple Slices always steal the show at our family's Halloween bash. Crispy apples meet vibrant, crunchy candy shells—looking magical on a platter and disappearing faster than you can say boo. Perfect for parties, school events, or little hands eager for sweet treats that are easy to eat and share.
The first time I made these, my nieces decorated their own slices and giggled as they compared their designs. Now it is tradition that everyone gets creative with colors and sprinkles.
Ingredients
- Crisp apples: Granny Smith or Honeycrisp varieties hold up best and offer a balance of tartness and sweetness
- Lemon juice: brushing prevents browning and keeps the slices looking bright
- Granulated sugar: important for a smooth, glassy candy coating
- Light corn syrup: helps ensure the candy coating stays glossy and crackly without crystallizing
- Water: essential for dissolving the sugar and cooking the syrup evenly
- Cream of tartar: promotes a clear, stable candy shell rather than one that turns grainy
- Food coloring: gives a pop of festive color and makes each slice unique try gel colors for super vibrant results
- Vanilla extract: offers a subtle warmth and makes the candy flavor more authentic
- Mini chocolate chips: tasty fun add-on that sticks well to the hot candy
- Crushed nuts: add crunch and flavor use freshly chopped for best texture
- Assorted sprinkles: perfect for a playful Halloween vibe look for gluten-free options if needed
Tired of Takeout? 🥡
Get 10 meals you can make faster than delivery arrives. Seriously.
One email. No spam. Unsubscribe anytime.
Instructions
- Prep Your Slices:
- Start by washing and coring your apples. Slice each into six wedges. Brush the cut surfaces generously with lemon juice so they stay fresh and white. Insert your popsicle sticks into the base of each wedge so they are ready for dipping.
- Make the Candy Syrup:
- Use a heavy saucepan to combine sugar, corn syrup, water, and cream of tartar. Stir gently over medium heat until everything dissolves and the mixture looks clear.
- Boil to Hard Crack Stage:
- Let the mixture come to a boil and resist stirring at this point. The syrup should bubble steadily. Keep a close eye on the temperature using your candy thermometer. You want it to reach 300 degrees Fahrenheit which is the hard crack stage. This usually takes eight to ten minutes. Watch out for color changes—the syrup should stay pale.
- Color and Flavor the Syrup:
- Once the right temperature hits, quickly remove the saucepan from heat. Stir in your chosen food coloring and vanilla extract. Be ready to work quickly since the syrup begins to firm up soon.
- Dip the Apple Slices:
- Working efficiently, dunk each apple slice into the hot candy syrup. Twist gently so the coating is even. Allow excess syrup to drip off before setting the slice on your parchment lined baking sheet.
- Decorate While Warm:
- As soon as a slice is dipped, immediately add desired toppings such as nuts, mini chips, or sprinkles. The candy coating hardens fast, so prompt decoration gives the best results.
- Cool and Set:
- Let the finished slices sit at room temperature until the candy coating is completely set and hard. This keeps them crisp and easy to serve.
 Save It
 Making these apples always reminds me of my grandmother's vivid Halloween platters. The brightly colored slices are my favorite part because every guest can choose their own design and topping. It turns into a lively game of who made the most creative combo.
Storage Tips
Store apple slices in one layer in an airtight container so the coating does not stick or soften. Keep at cool room temperature up to two days. Do not refrigerate as condensation causes the candy to become sticky.
Ingredient Substitutions
Swap corn syrup for honey or maple syrup but expect a softer coating. If avoiding nuts use only sprinkles or mini chocolate chips. You can use plant-based chocolate for an allergy friendly version.
Serving Suggestions
Arrange slices upright in cups for grab-and-go party snacking. To build an edible Halloween centerpiece, stand decorated apples in a pumpkin or gourd with holes for the sticks.
Cultural and Historical Context
Candy apples have been a fall favorite in America for over a century. Slice versions were born from the need for easy sharing and kid friendly sizes. The bright colors and playful toppings build on the tradition—making them a new classic at today's parties.
Seasonal Adaptations
Try green or purple food coloring for a spooky effect Drizzle cooled slices with melted chocolate webs for a Halloween twist Top with edible glitter to look like magical fairy apples
Success Stories
My youngest cousin once brought a plate of rainbow-topped slices to her class Halloween party. Every parent asked for the recipe—and now they hand out apple slices instead of whole apples every year.
Freezer Meal Conversion
If you want to make ahead freeze dipped plain slices on parchment then thaw and add toppings day of serving. They keep their crunch for weeks.
 Save It
 Enjoy serving these magical apple slices—everyone will go wild for the colors and sweet crunch at your next Halloween bash.
Common Questions About Recipes
- → How do I keep the apple slices from browning?
Brush each apple slice with lemon juice after cutting. This helps prevent browning.
- → What kind of apples work best?
Granny Smith and Honeycrisp apples are recommended for their crisp texture and tart flavor balance.
- → How do I know the candy coating is ready?
Use a candy thermometer and heat the mixture to 300°F (hard crack stage) for best results.
- → Can I use natural food coloring?
Yes, natural or plant-based food colors can be substituted for synthetic versions if preferred.
- → Are there gluten-free or allergy-friendly topping options?
Choose gluten-free toppings and always check labels for nuts, dairy, or soy if dietary restrictions apply.
- → How long can coated apple slices be stored?
Store in an airtight container in a single layer for up to 2 days to maintain freshness and crunch.