 Save It
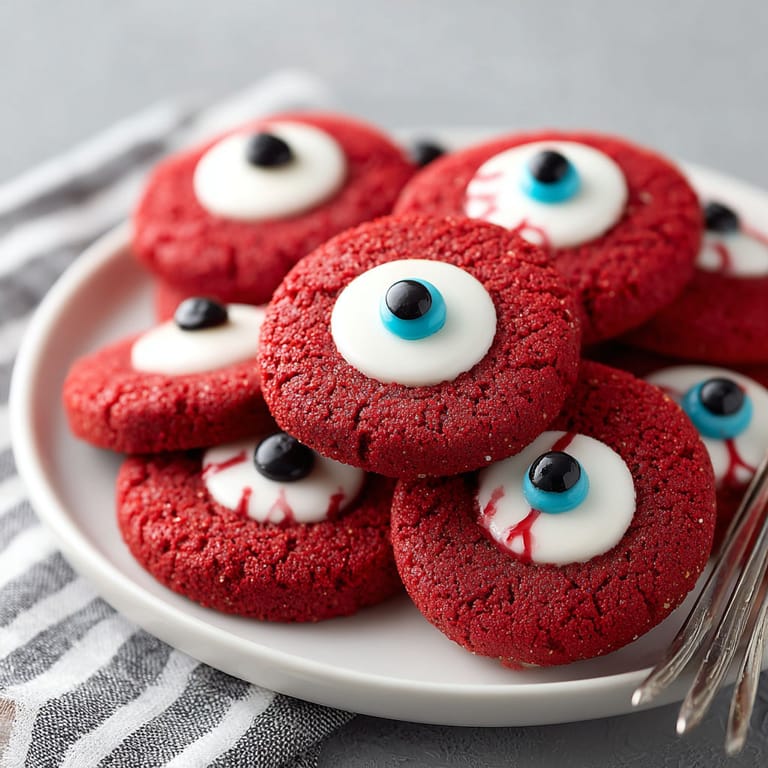
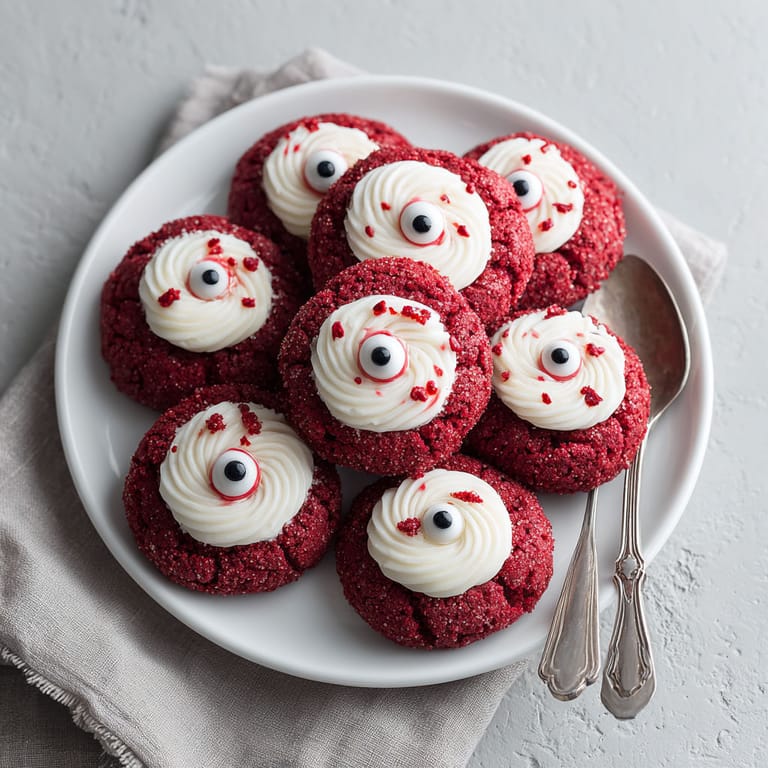
 These red velvet cake mix eyeball cookies are the ultimate crowd-pleaser for Halloween or any ghoulish party. Each bite gives you that classic red velvet flavor with an irresistibly soft texture, while the playful candy eyeball decoration adds a spooky twist that gets kids and adults talking. Whether you are throwing a party or need a fun treat for school, these cookies turn simple ingredients into something unforgettable.
The first time I made these for my niece’s Halloween class party, every single cookie was gone before I finished unpacking. Now my family expects them every year during spooky season.
Ingredients
- Red velvet cake mix: gives classic color and flavor; choose a reputable brand with rich cocoa notes for best taste
- Eggs: bind the dough and add richness; fresh large eggs work best for structure
- Vegetable oil: keeps the cookies moist; opt for a neutral flavored oil with a clean scent
- Vanilla extract: enhances the overall flavor; pure extract gives the best aroma
- Powdered sugar: for the icing; use sifted sugar for the smoothest finish
- Milk: thins the icing to the perfect consistency; whole or 2 percent milk helps give a creamy texture
- Candy eyeballs or chocolate buttons with gel icing: add a spooky detail; check the label for allergy-friendly options if needed
- Red gel food coloring: creates the bloodshot effect; use a high-quality gel for most vivid color
- Blue and black gel icing: allow DIY eyeballs; food-grade gel pens give detailed results
Tired of Takeout? 🥡
Get 10 meals you can make faster than delivery arrives. Seriously.
One email. No spam. Unsubscribe anytime.
Instructions
- Prepare Baking Sheets:
- Line two large baking sheets with parchment paper to prevent sticking and ensure even baking
- Mix the Cookie Dough:
- In a large bowl combine cake mix eggs vegetable oil and vanilla extract Use a sturdy whisk or electric mixer on low speed Blend until a thick smooth dough forms and no pockets of dry mix remain
- Portion the Dough:
- Scoop tablespoon-sized balls of dough Rolling lightly between your palms can help shape them Place them two inches apart on the baking sheets to give each cookie room to spread
- Bake the Cookies:
- Place trays in the preheated 350 degree oven Bake for 9 to 11 minutes Edges should look set and just dry but the centers will look slightly glossy Do not wait for a dry center or cookies will be overbaked Let them cool on the baking sheet for five minutes before transferring
- Cool Completely:
- Transfer cookies to a wire rack with a spatula Let them cool entirely before icing or the decorations will melt
- Make the Icing:
- In a medium bowl whisk together powdered sugar milk and vanilla until perfectly smooth Add milk a few drops at a time if it is too thick The icing should slowly fall from a spoon in ribbons
- Decorate the Cookies:
- Spoon or pipe a circle of icing on the center of each cooled cookie Set a candy eyeball right into the icing while it is still wet so it anchors well
- Finish Spooky Effects:
- Optional Using a toothpick or piping bag add veins and drips with red gel food coloring for eerie bloodshot detail
- Set and Serve:
- Let cookies sit undisturbed for icing to set at least ten minutes before serving or packaging for best appearance
 Save It
 Last year my youngest nephew and I both got chocolate on our noses trying to eat his first cookie and we still laugh about it.
Storage Tips
Keep finished cookies in an airtight container at room temperature for up to three days. Separate layers with parchment paper if stacking to preserve decorations. For longer storage freeze undecorated cookies and add icing and eyeballs after thawing.
Ingredient Substitutions
Swap in yellow cake mix or chocolate cake mix for a different twist on the same technique. Use coconut oil or melted butter instead of vegetable oil for a richer taste. Homemade icing can be colored with plant-based dyes if avoiding artificial colors.
Serving Suggestions
Arrange cookies on a dark platter or mini cupcake liners for dramatic Halloween presentation. Pair with witch’s brew punch or hot chocolate for kids parties. Break cookies in half and use as creepy sandwich toppers for themed dessert platters.
Cultural and Historical Context
Red velvet’s origins are Southern but its deep color and cocoa flavor make it a fun base for Halloween baking traditions. Decorated cookies appeared as popular Halloween fare in US home kitchens by the late 20th century. Personalizing party sweets with edible decorations helps to engage kids and guests of all ages.
Seasonal Adaptations
Decorate with green and purple gel for an alien party. Use pastel colors and candy flowers for spring monster cookies. Pair with peppermint extract and colored sugar for a holiday version.
Success Stories
Kids always request these cookies at classroom events and bake sales. Several readers have told me they adapted this for vegan friends with egg replacers and plant milk. Even adults at work potlucks have declared these their favorite treat.
Freezer Meal Conversion
Bake the cookies as directed and cool completely. Freeze undecorated cookies in layers separated by parchment paper. Defrost at room temperature then decorate just before serving for best results.
Save It These spooky cookies will make any Halloween celebration unforgettable and bring a smile to every guest. Enjoy baking and have fun decorating!
Common Questions About Recipes
- → How do I achieve soft, chewy cookies?
Avoid overbaking—remove cookies when edges are set but centers are still soft. Let cool on the baking sheet to finish setting.
- → Can I make homemade candy eyes?
Yes! Use white chocolate buttons and decorate with blue and black gel icing for the iris and pupil.
- → Is it necessary to chill the dough?
Chilling is not required for this dough, as cake mix bases hold their shape well during baking.
- → How do I create a bloodshot effect?
Drizzle red gel food coloring around the candy eye after icing for a spooky bloodshot look.
- → How should I store these cookies?
Place in an airtight container at room temperature for up to 3 days to maintain softness and freshness.
- → Are there any dietary considerations?
Contains wheat and eggs; use dairy-free alternatives if needed, and check all ingredient labels for allergens.