Save It
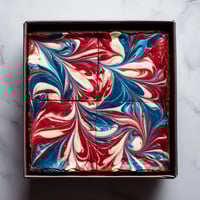
 This fudgy red, white, and blue marbled brownie recipe combines rich chocolate with vibrant cheesecake swirls for a showstopping patriotic dessert. The contrast between the deep chocolate base and colorful cheesecake creates a dessert that's as beautiful as it is delicious.
I first made these for a neighborhood block party, and they disappeared faster than any other dessert. Now they're requested at every summer gathering, and my kids love helping create the colorful swirls.
Ingredients
- Unsalted butter: gives a rich flavor foundation while allowing the chocolate to shine
- Semisweet chocolate: creates the perfect balance of sweetness and depth use highquality bars for best results
- Brown sugar: adds moisture and a subtle caramel note that enhances the chocolate flavor
- Cream cheese: use fullfat Philadelphia for the creamiest texture and best swirls
- Gel food coloring: provides vibrant color without thinning the batter liquid food coloring can make the cheesecake mixture too runny
Tired of Takeout? 🥡
Get 10 meals you can make faster than delivery arrives. Seriously.
One email. No spam. Unsubscribe anytime.
Step-by-Step Instructions
- Prepare Your Pan:
- Line your baking pan with parchment paper leaving some overhang on the sides. This ensures easy removal and perfect squares when cutting. A light spray of cooking oil underneath helps the parchment stay in place.
- Create The Brownie Base:
- Melt the butter and chocolate together over low heat. This step requires patience as chocolate can seize if heated too quickly. Stir constantly until glossy and completely smooth. The mixture should look like satin but not be too hot.
- Incorporate Wet Ingredients:
- Add the sugars to the chocolate mixture while still warm and whisk vigorously. This helps dissolve the sugar crystals for a smoother texture. Let cool slightly before adding eggs to prevent scrambling them. The vanilla adds depth that complements the chocolate beautifully.
- Add Dry Ingredients:
- Gently fold in the flour and salt just until no dry streaks remain. Overmixing will develop gluten and create cakey rather than fudgy brownies. The batter should be thick and glossy at this stage.
- Prepare Cheesecake Mixture:
- Beat the cream cheese until completely smooth before adding other ingredients. Any lumps now will be visible in the final swirls. The mixture should be thick enough to hold its shape when dropped onto the brownie batter.
- Create The Color Divisions:
- Divide the cheesecake mixture evenly between three small bowls. Add red gel coloring to one and blue to another, leaving the third white. Start with just a small amount of coloring and gradually add more until you achieve your desired intensity.
- Create The Marble Pattern:
- Drop alternating spoonfuls of each color onto the brownie batter. Use a toothpick or skewer to swirl with intention creating figure eights and loose patterns. Avoid overmixing or the colors will blend rather than marbling beautifully.
- Bake To Perfection:
- The brownies are done when the edges are set but the center still has slight movement. The cheesecake areas may look slightly puffed. Remember that carryover cooking will continue after removal from the oven.
 Save It
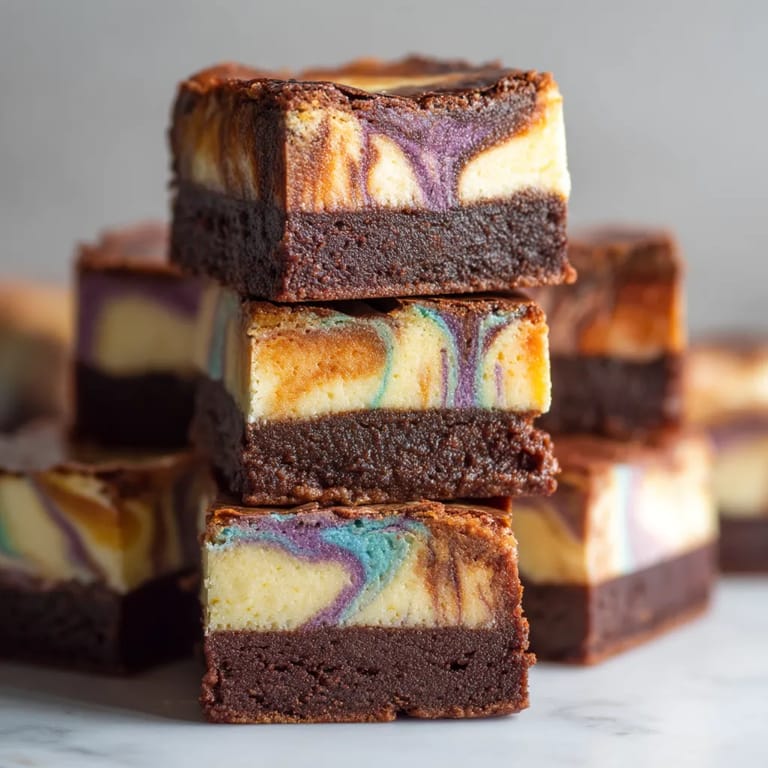
 The first time I served these at our family reunion, my grandmother who rarely gives compliments on desserts asked for the recipe. The combination of creamy cheesecake against rich chocolate creates such a wonderful textural contrast that makes these truly special.
Achieving Perfect Swirls
The secret to stunning marbled patterns is in the consistency of both batters. The brownie batter should be thick enough to support the cheesecake mixture without letting it sink completely. If your kitchen is warm, refrigerate the brownie batter for 10 minutes before adding the cheesecake mixture. When swirling, less is more. Just 5 or 6 gentle passes with a toothpick will create the most beautiful patterns. Overswirling turns the colors muddy rather than distinct.
Storage And Make-Ahead Tips
These brownies actually improve with time as the flavors meld together. Store them in an airtight container in the refrigerator for up to 5 days. The cold temperature also firms up the texture making them even more fudgy and cheesecakelike. For longer storage, individually wrap cut brownies in plastic wrap then place in a freezer bag. They freeze beautifully for up to 3 months. Thaw overnight in the refrigerator before serving.
Customizing Your Colors
While red white and blue make these perfect for patriotic holidays, you can easily adapt this recipe for other occasions. Try school colors for graduation parties, team colors for game day celebrations, or seasonal colors for holidays. Orange and black swirls create spooky Halloween brownies, while red and green work beautifully for Christmas gatherings. The technique remains the same just change your color palette.
Save It Common Questions About Recipes
- → What's the best type of hot dog to use?
All-beef hot dogs generally offer the best flavor and texture, but you can also use turkey, chicken, or vegetarian options based on dietary preferences. Look for hot dogs with natural casings for the best snap when you bite into them. Premium brands typically provide better quality and taste.
- → Can I make the relish ahead of time?
Yes! The homemade relish actually improves with time as the flavors meld together. You can make it up to 3 days in advance and store it in an airtight container in the refrigerator. This makes it perfect for meal prep or when planning for cookouts and gatherings.
- → What's the best way to toast hot dog buns?
For optimal results, lightly butter the inside of the buns and place them cut-side down on the grill for 1-2 minutes until golden brown. You can also toast them in a skillet or under a broiler. Toasting adds texture and prevents the buns from becoming soggy when you add toppings.
- → How can I adapt this for a large crowd?
This dish scales easily for crowds. Simply multiply the ingredients based on your guest count. For serving a large group, consider setting up a hot dog bar with the grilled hot dogs, toasted buns, homemade relish, and various additional toppings in separate bowls. This allows guests to customize their own hot dogs.
- → What sides pair well with these hot dogs?
Classic American sides like potato salad, coleslaw, baked beans, corn on the cob, or potato chips complement these hot dogs perfectly. For a healthier option, consider a fresh green salad or grilled vegetables. For beverages, lemonade, iced tea, or a cold beer pairs wonderfully with this casual meal.
- → Can I grill the hot dogs indoors?
Absolutely! While outdoor grilling imparts a wonderful smoky flavor, you can achieve excellent results indoors using a grill pan, cast iron skillet, or broiler. For stovetop methods, cook over medium heat for 5-7 minutes, turning occasionally. Under a broiler, place hot dogs on a sheet pan and cook 4-5 inches from the heat source.