 Save It
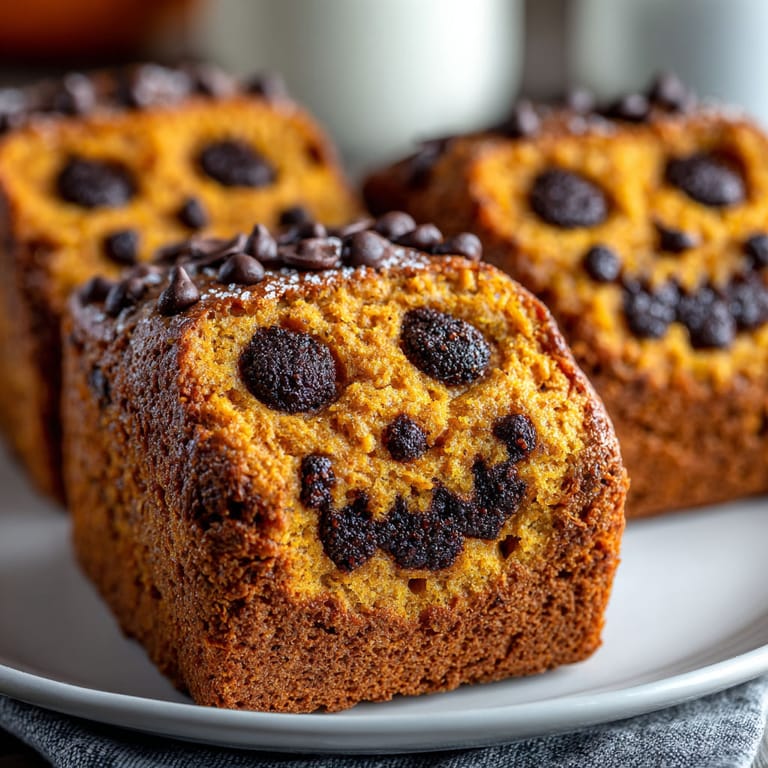
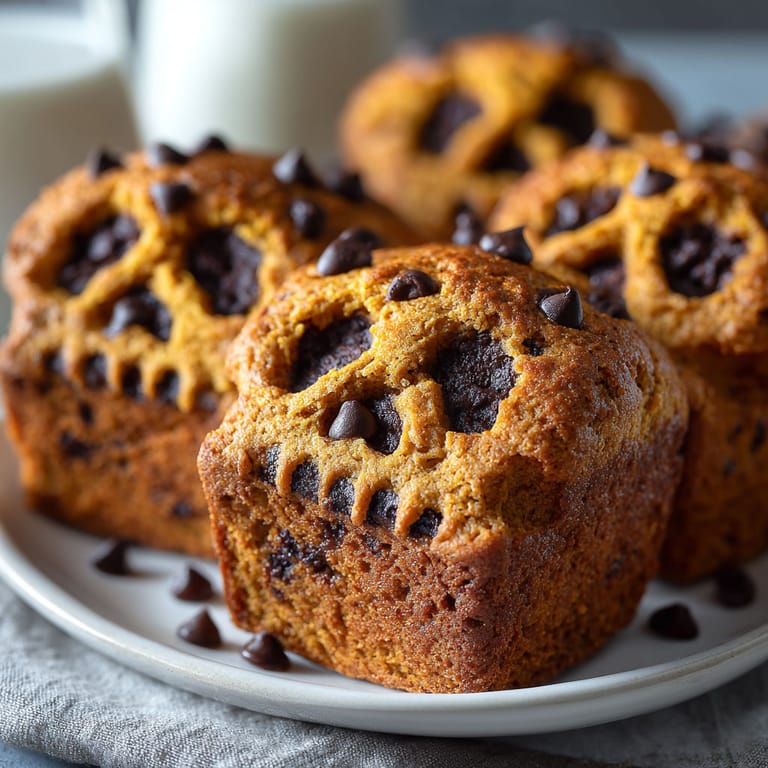
 Every fall, I cannot resist the urge to bake these gluten-free pumpkin sourdough skulls to celebrate the season and Halloween. Each batch turns out soft, slightly tangy, and aromatic with warm spice. The skull shape adds a playful twist, making them an instant crowd-pleaser at autumn gatherings. Plus, this recipe helps me use up sourdough starter in a fun and flavorful way.
My family’s favorite tradition is to let kids paint silly or spooky faces on the cooled skulls with melted chocolate. I first made these for a Halloween party, and now it is the treat everyone asks for each October.
Ingredients
- Pumpkin purée: for rich flavor and beautiful orange color select pure unsweetened purée not pie filling
- Warm water: for activating sourdough and allowing gentle dough hydration make sure it is comfortably warm not hot
- Active gluten-free sourdough starter: for lovely tang and a light rise ensure your starter is bubbly and fed
- Olive oil: for moistness and subtle earthiness choose a fruity mild oil
- Maple syrup: adds fall sweetness and depth pure maple syrup offers best flavor
- Gluten-free all-purpose flour: provides structure with xanthan gum included check the label for the gum to avoid crumbling
- Almond flour: keeps the bread tender and gently sweet opt for finely ground for smooth texture
- Fine sea salt: sharpens flavors and boosts overall taste use a high-quality brand
- Ground cinnamon, nutmeg, ginger, and cloves: give a classic pumpkin spice aroma use fresh spices for bold flavor
- Instant yeast: ensures reliable rising even with sourdough fresher yeast is better
- Optional dark chocolate chips: for piping festive faces look for glossy high-cocoa-content chips for easier melting
Tired of Takeout? 🥡
Get 10 meals you can make faster than delivery arrives. Seriously.
One email. No spam. Unsubscribe anytime.
Instructions
- Mix Wet Ingredients:
- In a large mixing bowl stir together pumpkin purée warm water gluten-free sourdough starter olive oil and maple syrup. Make sure the mixture is homogenous and no lumps remain for the smoothest texture later.
- Combine Dry Ingredients:
- In a separate bowl whisk together gluten-free all-purpose flour almond flour sea salt cinnamon nutmeg ginger and cloves. Sift if your flour tends to clump.
- Incorporate Dry Into Wet:
- Gradually add the dry ingredients to the wet mixture mixing with a sturdy spatula until a sticky dough forms. Scrape the sides and bottom to ensure all flour is moistened.
- Add Leavening:
- Sprinkle instant yeast evenly over the dough and mix thoroughly so the yeast is distributed. The dough may be slightly sticky and loose which is normal for gluten-free baking.
- First Rise:
- Cover the bowl with plastic wrap or a kitchen towel and let it rise in a warm draft-free spot for about an hour and a half to two hours. The dough should look slightly puffed and feel lighter when gently poked.
- Prepare the Mold and Oven:
- Preheat oven to three hundred seventy five degrees Fahrenheit one hundred ninety degrees Celsius. Grease skull-shaped silicone or metal baking molds well so the bread releases easily after baking.
- Shape and Fill:
- Scoop the dough into the molds dividing it evenly. Wet your fingers and gently smooth the tops for a clean finish. The dough will not spread much in the oven.
- Second Rest:
- Let the filled molds rest at room temperature twenty minutes while the oven comes to temperature. This quick rest lets the dough relax for the best shape and final texture.
- Bake:
- Place molds in the oven and bake for twenty five to thirty minutes until skulls are golden and the tops are set. The bread should feel firm to the touch.
- Cool and Unmold:
- Remove from oven and let cool in molds ten minutes before turning out onto a wire rack. This prevents sticking and helps set the crumb.
- Decorate:
- Once completely cool melt the chocolate chips and transfer to a piping bag or zip-top bag with a small corner cut off. Pipe faces or designs as desired. Allow chocolate to set before serving.
 Save It
 The pumpkin purée is my favorite part since it always reminds me of carving jack-o-lanterns with my grandmother every fall. I can still hear her stories while we’d wait for these little loaves to rise and fill the kitchen with spice.
Storage Tips
Let pumpkin sourdough skulls cool completely before storing. Place in an airtight container or zip-top bag at room temperature for up to two days. For longer storage freeze on a tray and then move to a bag for up to a month. Thaw at room temp or heat gently in an oven.
Ingredient Substitutions
No almond flour? Swap in finely milled oat flour for a nut-free version with similar tenderness. If you are not a maple syrup fan honey works well for sweetness. For a vegan version make sure your sourdough starter and chocolate are dairy-free.
Serving Suggestions
Serve warm with a little vegan butter or a sweet spread like apple butter or cinnamon honey. These skulls are a perfect addition to Halloween parties or autumn brunch tables. They also pair well with soups or a spiced chai latte for snack time.
Cultural and Seasonal Fun
Baking shaped breads to mark holidays is a tradition in many cultures. Pumpkin bread is the essence of American autumn and the skull motif gives a nod to Halloween and Day of the Dead celebrations. For a winter spin swap in canned sweet potato and add orange zest.
Seasonal Adaptations
Swap in sweet potato purée for a different twist Add orange zest or mini chocolate chips inside for a bonus flavor Use mini loaf pans or muffin tins if you do not have skull molds
Success Stories
The first time I brought these to a Halloween potluck the platter was empty before the main dish was even served. One neighbor messaged me days later for the recipe and has made them every October since. Kids especially love decorating their own skull—and eating the faces first.
Freezer Meal Conversion
Bake skulls as directed and cool fully. Freeze on a tray then store in bags. They reheat best wrapped in foil and placed in a warm oven for ten to fifteen minutes—fresh as the day they were made.
Save It Enjoy these gluten-free pumpkin sourdough skulls at your next autumn gathering. They make baking for Halloween as fun as it is delicious.
Common Questions About Recipes
- → How can I ensure a successful rise for gluten-free dough?
Allow the dough to rise in a warm area, use active starter, and add instant yeast for reliability when working with gluten-free flours.
- → Can I use a different mold if I don’t have a skull-shaped one?
Yes, muffin tins work well if skull-shaped molds aren’t available. You’ll get festive pumpkin sourdough buns instead.
- → What’s the best way to decorate the skulls?
Melt dark chocolate chips and use a piping bag or zip-top bag with a snipped corner to create faces on the cooled skulls.
- → Is this bread suitable for vegans?
For a vegan version, use a dairy-free sourdough starter and dairy-free chocolate for decorating the bread skulls.
- → Does the bread stay soft after baking?
Yes, it remains moist and tender, especially if enjoyed shortly after baking or lightly warmed before serving.
- → What spreads pair well with the bread?
Try butter, honey, or apple butter for a rich and delicious accompaniment to the pumpkin sourdough.