 Save It
 My daughter came home from preschool clutching a paper bunny decoration, and I knew Easter was officially happening in our house whether I was ready or not. That afternoon, she dragged me to the kitchen with this wild idea: what if we made fruit that looked like bunnies? I laughed at first, but twenty minutes later, surrounded by marshmallows and candy eyes, I watched her face light up as these ridiculous little creatures came to life in clear cups. Now they're her favorite part of Easter breakfast.
I brought these to a neighborhood Easter potluck thinking they were maybe too silly, but they disappeared in minutes while the fancy casseroles sat untouched. A mom I barely knew pulled me aside and asked if I'd make them for her son's birthday party, and suddenly I realized I'd stumbled onto something special—it wasn't about the fruit at all, it was about the joy of eating something that made you smile.
Ingredients
- Strawberries, hulled and diced: Pick the ripest ones you can find because their natural sweetness is the backbone of these cups, and I learned the hard way that sad strawberries make sad bunnies.
- Green grapes, halved: These add a crisp contrast and prevent the whole thing from tasting too sweet, which your kids' dentist will appreciate.
- Blueberries: They stay firm and roll around in a satisfying way, plus they add that gorgeous pop of color.
- Pineapple, diced: Fresh pineapple brings a tropical brightness that keeps things interesting, though canned works in a pinch.
- Small clear plastic cups: The clear part is non-negotiable because the whole magic of this recipe is seeing those colorful fruits through the sides.
- Large marshmallows: These are your bunny cheeks, so pick the fluffiest ones that'll really frame that little face.
- Mini marshmallows: Perfect for noses, though pink candies work just as well if you want to skip the marshmallow flavor.
- Candy eyes: These little edible eyeballs are what actually bring the bunny to life, so don't cheap out here.
- Pink jellybeans or pink chocolate candies: Choose jellybeans if you want that cute little bump effect, or chocolates if you want something slightly more sophisticated looking.
- White paper cupcake liners: Regular baking cups folded and cut into ear shapes work beautifully, and there's something satisfying about how they stand up.
- Black edible marker: This is what gives each bunny personality, so get one that actually works well and won't smudge on the marshmallows.
- Banana and kiwi (optional): These add even more color variation and are great if you have kids with strong fruit preferences.
Tired of Takeout? 🥡
Get 10 meals you can make faster than delivery arrives. Seriously.
One email. No spam. Unsubscribe anytime.
Instructions
- Prep your fruit like you mean it:
- Wash everything thoroughly and cut your pieces to roughly the same size so they nestle together nicely in the cups. This takes a few minutes but makes assembly infinitely easier, and nobody wants to bite into a surprise cherry pit at their Easter party.
- Create a colorful fruit base:
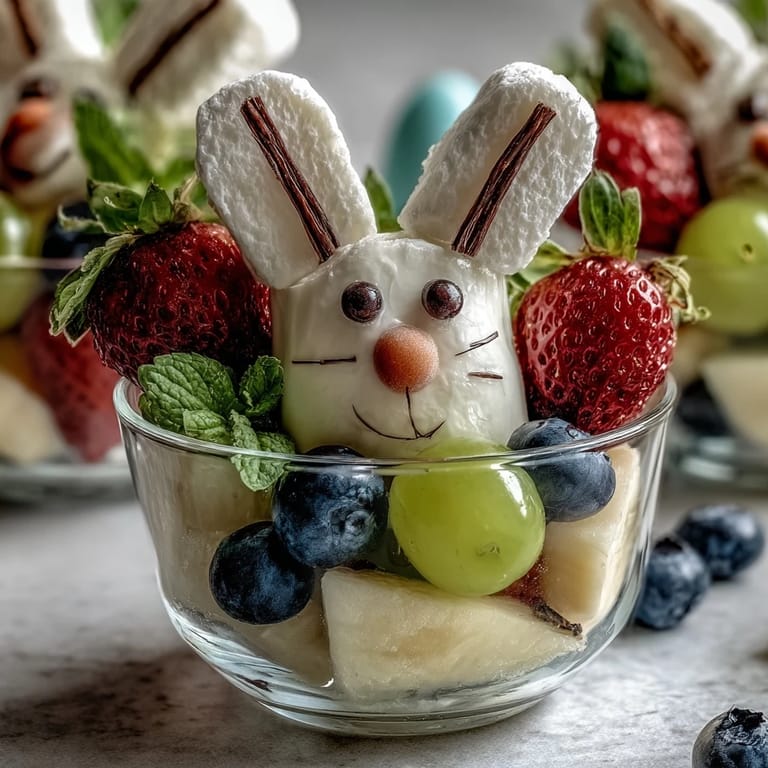
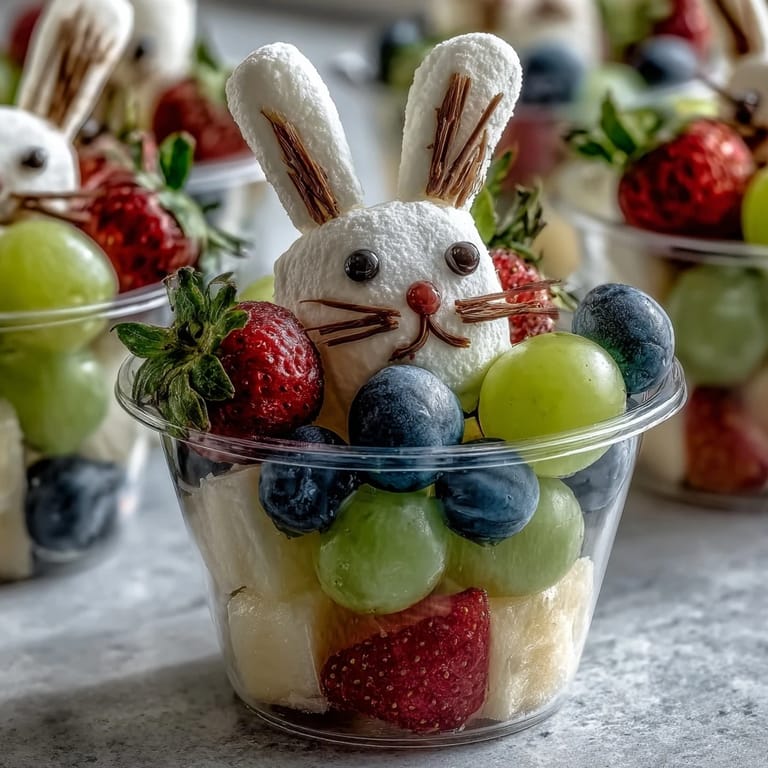
- Toss all your prepped fruit into a big bowl and give it a gentle stir, then divide it evenly among the six cups, filling each one about three-quarters full. Stand back and admire how beautiful it already looks before the bunny magic happens.
- Build those bunny faces:
- Take two large marshmallows and press them gently onto the front of each cup to create the cheeks, then nestle a mini marshmallow or pink candy right between them for the nose. Use a tiny dab of honey or icing as your glue—it works better than you'd think and doesn't taste weird like tape would.
- Add eyes and character:
- Carefully press the candy eyes onto each marshmallow cheek, positioning them above where the nose will be. Don't overthink the placement; even wonky-eyed bunnies are impossibly cute.
- Draw whiskers and a smile:
- Use your black edible marker to sketch three little whisker lines on each side of the nose and a small curved mouth below, giving each bunny its own personality. A few practice strokes on a piece of paper first won't hurt if you're nervous about the marker.
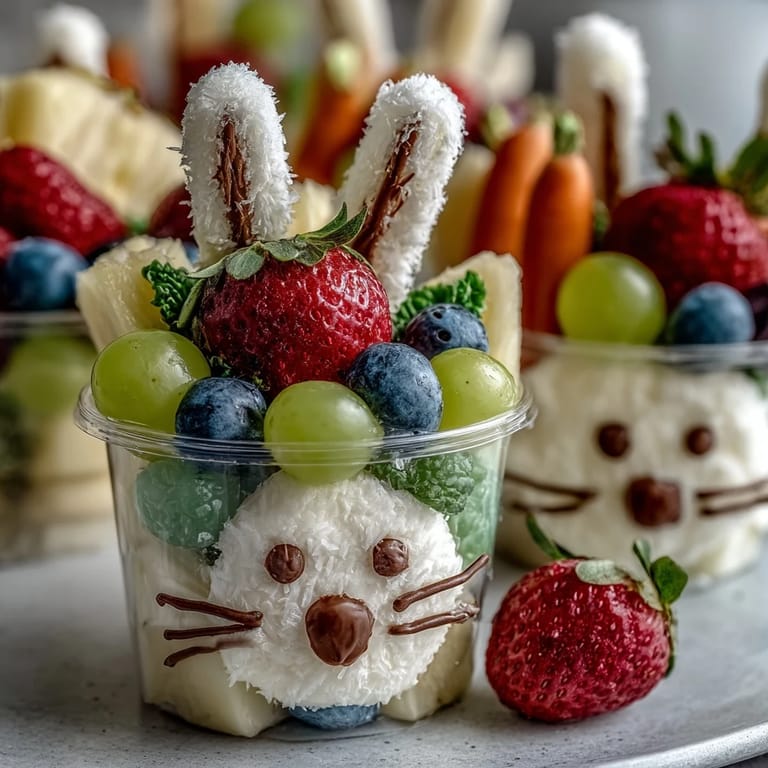
- Create standing ears:
- Fold your white cupcake liners in half and carefully cut them into ear shapes—long and pointed, like you're channeling your inner bunny. Tape or glue two ears to the back inside rim of each cup so they stick up above the fruit.
- Chill and serve:
- Pop them in the fridge for up to four hours if you're making them ahead, or serve them right away while that marshmallow still has a bit of give to it. The fruit stays fresh and the whole setup is sturdy enough that kids can grab and hold them easily.
 Save It
 At my nephew's Easter party, a shy four-year-old who never eats fruit at family gatherings picked up one of these bunnies and immediately had to show everyone his new friend before he'd even taken a bite. That's when I understood that the real ingredient here isn't the marshmallows or the candies—it's the permission to play with your food and make eating feel like an adventure.
Making Them Kid-Friendly
This recipe becomes an actual craft project the moment you hand kids a marker and let them design their own bunny faces, and I promise you that the slightly crooked whiskers and googly eyes are a thousand times better than anything you could create yourself. My daughter spent more time naming her bunnies and giving them backstories than eating them, which meant I'd accidentally created a toy made of fruit—not a bad trade-off in my book.
Seasonal Swaps and Creative Twists
While these are quintessentially Easter, I've made versions with different colored candies for Halloween pumpkins and Christmas with red and green fruit combinations. The structure stays the same but the personality changes completely, which is why this recipe feels like it could live year-round in your kitchen if you weren't careful about putting it away after spring.
Allergy-Friendly Alternatives and Storage
If marshmallows are off the table, use mini pretzel rods for cheeks or stack two vanilla wafer cookies instead, and vegan marshmallows exist now and work surprisingly well. These keep in the refrigerator for up to four hours before the marshmallows start getting a little weepy and the fruit begins to soften, so make them closer to serving time if possible.
- Double-check all your candies and markers for allergens if you're serving kids with sensitivities.
- Let the fruit come to room temperature for about ten minutes before serving so it's not shocking cold against the marshmallows.
- Buy extra candy eyes and markers because you will absolutely lose them in the chaos of assembling six bunnies.
 Save It
 These little bunnies have somehow become the thing my family requests by name now, which still surprises me because it's just fruit and marshmallows. But that's the secret of feeding people you love—sometimes it's not about the ingredients at all, it's about the joy and silliness you serve it with.
Common Questions About Recipes
- → What fruits work best for bunny fruit cups?
Strawberries, grapes, blueberries, and pineapple provide vibrant color and sweet flavors that pair well in these festive cups.
- → How do I create the bunny ears for decoration?
Fold paper cupcake liners in half, cut ear shapes, and tape or glue them to the rim of each cup for cute bunny ears.
- → Can I make this snack dairy-free?
Yes, by skipping marshmallows or using vegan marshmallow alternatives, you can keep this snack dairy-free.
- → How long can the fruit cups be stored before serving?
They can be refrigerated for up to 4 hours to keep the fruit fresh and decorations intact before serving.
- → What tools are needed to assemble the fruit cups?
A sharp knife, cutting board, mixing bowl, small clear cups, scissors, tape, and an edible marker are helpful for preparation and decorating.