 Save It
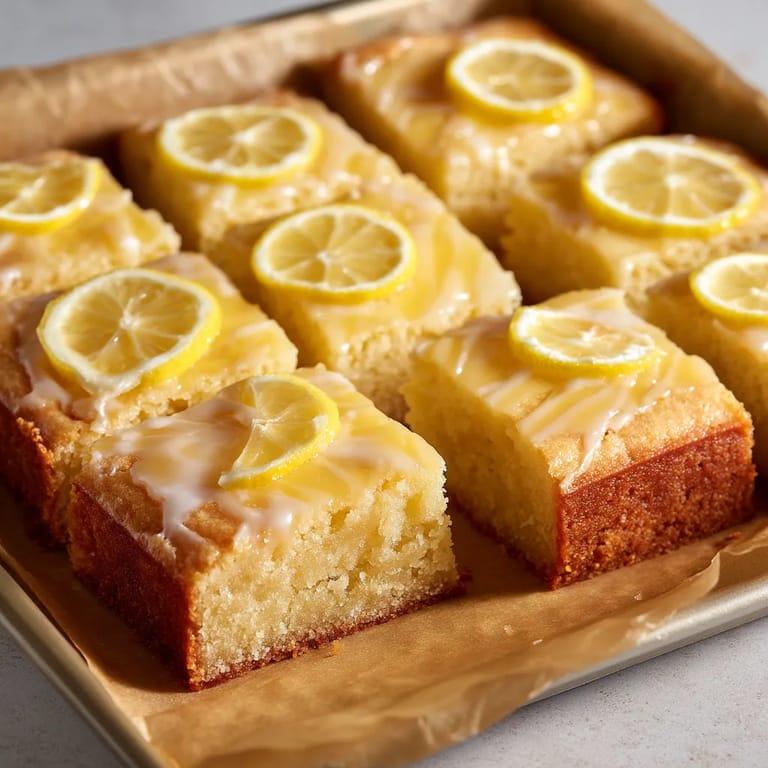
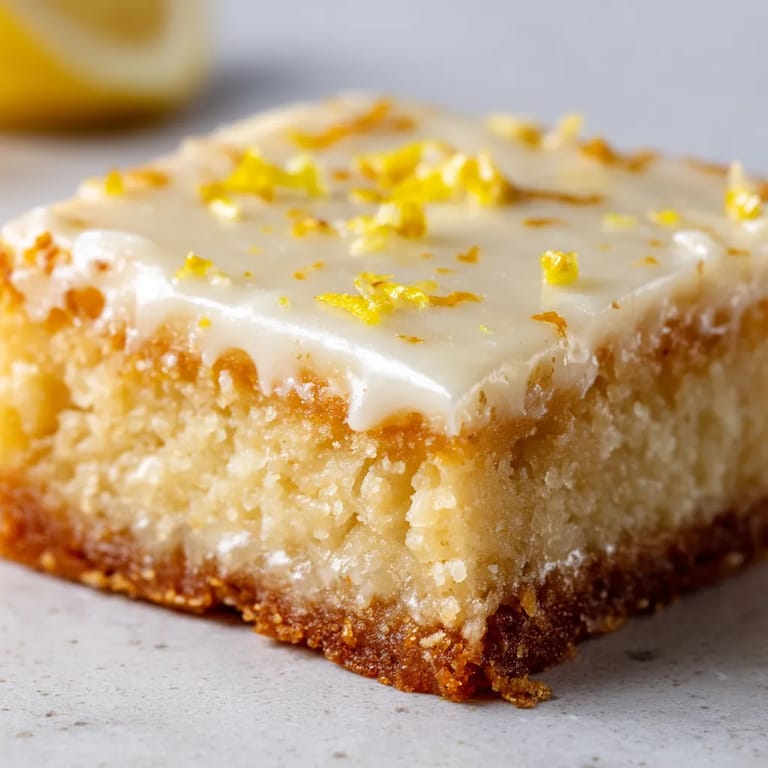
 This luscious lemon bar recipe balances the perfect combination of buttery shortbread and tangy lemon filling. The addition of the zesty glaze takes these bars to the next level, creating a dessert that's both elegant and comforting for any occasion.
I first made these lemon bars for a spring brunch with friends, and they disappeared faster than any other dessert on the table. The bright citrus flavor has become my signature contribution to gatherings year-round.
Ingredients
- Unsalted butter: provides the rich foundation and tender texture
- Powdered sugar: creates a more delicate crumb than granulated sugar
- All purpose flour: gives structure while remaining tender
- Salt: enhances all the flavors and balances the sweetness
Tired of Takeout? 🥡
Get 10 meals you can make faster than delivery arrives. Seriously.
One email. No spam. Unsubscribe anytime.
- Large eggs: provide structure and richness to the custard layer
- Granulated sugar: balances the tartness of the lemons
- All purpose flour: helps stabilize the filling during baking
- Fresh lemon zest: contains essential oils that provide intense flavor
- Freshly squeezed lemon juice: gives the authentic tartness
- Baking powder: helps the filling rise slightly for a lighter texture
- Salt: enhances the lemon flavor and balances sweetness
- Powdered sugar: creates a smooth, dissolvable base
- Fresh lemon juice: thins the glaze to the perfect consistency
- Lemon zest: adds visual appeal and intensifies flavor
Step-by-Step Instructions
- Prepare the Pan:
- Preheat your oven to exactly 175°C and position a rack in the center. Line your baking pan with parchment paper, leaving extra hanging over two sides to create handles. This makes removing the finished bars much easier.
- Make the Perfect Crust:
- Melt your butter completely but avoid overheating it. Combine with powdered sugar until smooth, then gently fold in flour and salt until just combined. The mixture will look slightly crumbly but should hold together when pressed. Use the bottom of a measuring cup to firmly and evenly press the mixture into your prepared pan, creating a flat, even surface.
- Bake the Foundation:
- Bake the crust until you see the edges turning a light golden color, about 15-18 minutes. The center should be set but not browned. A properly baked crust will support the filling without becoming soggy.
- Create the Lemon Filling:
- Whisk eggs thoroughly first before adding sugar to ensure no lumps form. Add remaining ingredients and whisk until completely smooth. The mixture should be pourable but not too thin. The small amount of flour helps stabilize the eggs during baking.
- Bake to Perfection:
- Pour the filling onto the warm crust and immediately return to the oven. Bake until the filling is just set in the center. When you gently shake the pan, the center should no longer be liquid but might have a slight jiggle. Overbaking will cause cracks and a rubbery texture.
- Cooling Process:
- Allow the bars to cool at room temperature for about an hour before refrigerating. This gradual temperature change prevents condensation and texture issues. Refrigerate for at least one hour to fully set the filling.
- Glaze with Precision:
- Start with powdered sugar in a bowl and gradually add lemon juice until you reach a thick but pourable consistency. It should slowly drip from a spoon. Pour over the chilled bars and tilt the pan to create an even layer. The cold surface helps the glaze set more quickly.
- Slice Like a Pro:
- Use a sharp knife dipped in hot water and wiped clean between cuts. For perfect presentation, trim the edges before cutting into even squares. Clean the knife after each cut for pristine edges.
 Save It
 I discovered that using European style butter with higher butterfat content makes the crust exceptionally tender. My grandmother always insisted on using the freshest eggs possible for the filling, claiming they created a silkier texture. After years of making this recipe, I completely agree with her wisdom.
Storage Solutions
These lemon bars will maintain their best quality when stored in an airtight container in the refrigerator for up to 5 days. Place sheets of parchment paper between layers to prevent sticking. For longer storage, freeze the unglazed bars by wrapping individually in plastic wrap then placing in a freezer bag. Thaw overnight in the refrigerator and add fresh glaze before serving.
Seasonal Variations
Summer brings Meyer lemons which offer a sweeter, more floral flavor profile for these bars. In winter months, try adding a small amount of rosemary or thyme to the crust for an herbal note that complements the citrus beautifully. During spring, top with fresh berries just before serving for a colorful twist. In autumn, a pinch of cinnamon in the crust adds warmth that balances the bright lemon.
Save It Perfect Pairings
Serve these lemon bars with a dollop of lightly sweetened whipped cream or a scoop of vanilla bean ice cream for a more substantial dessert. For afternoon tea, they pair wonderfully with Earl Grey or chamomile. Consider serving alongside fresh berries or a berry compote to complement the citrus flavors.
Common Questions About Recipes
- → How do I know when the lemon filling is properly set?
The lemon filling is properly set when the center no longer jiggles when you gently shake the pan. The top should appear set but might still have a slight wobble. Overbaking can cause cracks, so remove from the oven once the center appears stable but still has a slight glossiness.
- → Can I make these lemon bars ahead of time?
Absolutely! These lemon bars actually benefit from chilling time. You can make them up to 2 days in advance and store them covered in the refrigerator. Add the glaze the day you plan to serve them for the freshest appearance and taste.
- → How do I get clean cuts when slicing the bars?
For perfect slices, chill the bars thoroughly first. Use a sharp knife dipped in hot water and wiped clean between each cut. A gentle sawing motion rather than pressing straight down will help prevent the crust from crumbling and the glaze from cracking.
- → Can I freeze these lemon bars?
Yes, these lemon bars freeze well. Cut them into squares and place them in a single layer on a baking sheet to freeze initially. Once frozen, transfer to an airtight container with parchment paper between layers. Freeze for up to 3 months. Thaw overnight in the refrigerator before serving.
- → Why did my lemon filling develop a thin white layer on top?
A thin white layer sometimes forms when air incorporates into the filling during mixing and rises to the top during baking. To prevent this, avoid over-mixing the filling and tap the pan gently on the counter before baking to release air bubbles. The glaze will cover any discoloration.
- → Can I substitute bottled lemon juice for fresh?
Fresh lemon juice is strongly recommended for the best flavor. Bottled lemon juice often contains preservatives that can impart a slightly bitter or artificial taste. The zest, which contains essential oils, is particularly important for authentic lemon flavor and cannot be substituted with bottled products.