 Save It
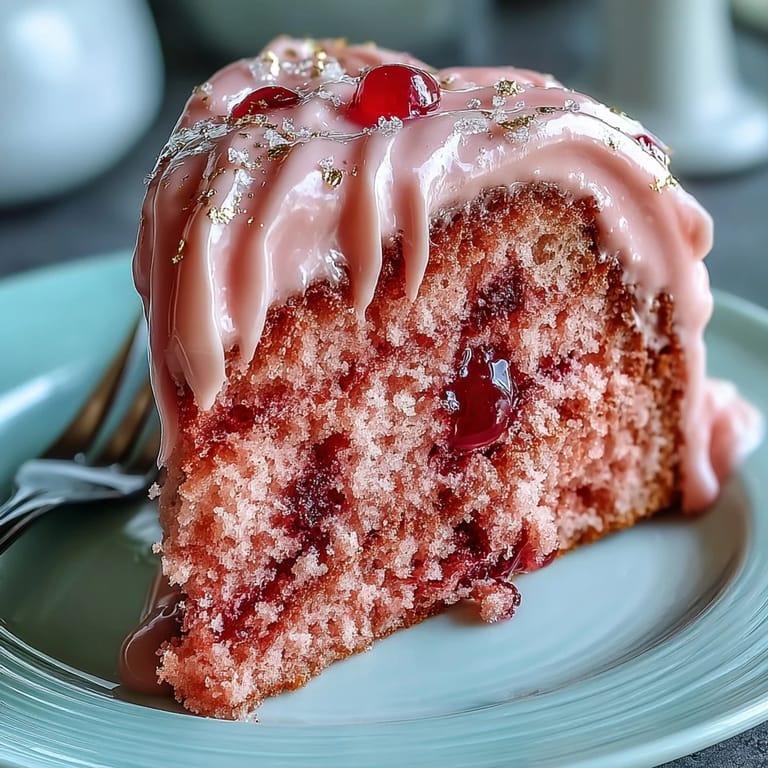
 There’s something quietly electric about watching a cake take shape in soft afternoon light, especially when it shimmers with unexpected gold. The first time I tested this rosé velvet cake, the gentle floral scent of wine and vanilla drifted over a countertop scattered with smudges of pink frosting and bits of parchment. The anticipation grew as I painted on each drop of gold, heart thumping for the reveal. The finished cake didn’t just look celebratory—it felt like a promise you could taste. This isn’t your usual party cake: for once, the grown-ups squealed before the children did.
I baked this for my friend Maya on the morning of her bridal shower: sunlight warming the kitchen, us giggling about old inside jokes while I nervously smoothed out a crumb coat with a wonky spatula. By the time the gold drip was painted and the last edible flower tucked in, we were almost late—fingers sticky, hearts buoyant, and the kitchen a glorious mess.
Ingredients
- All-purpose flour: Gently spoon and level for a tender crumb; too much and the cake can turn dense.
- Granulated sugar: Creaming this well with butter aerates the batter, making the cake fluffy.
- Baking soda & baking powder: These help the cake rise to elegant, light layers; be sure yours are fresh.
- Salt: Just a pinch brings out all the other flavors—don’t skip it.
- Unsweetened cocoa powder: Adds richness and depth to the blush color, but too much overpowers the rosé.
- Unsalted butter: Brings luxurious mouthfeel; soft but not melted is key for creaming.
- Buttermilk: The acidity keeps crumbs fine and moist—let it come to room temp for best mixing.
- Rosé wine: Use something bright and aromatic; taste it first, as the flavor shines through.
- Large eggs: Room temperature eggs integrate more smoothly, helping everything combine evenly.
- Vanilla extract: Adds warmth and depth, complementing the floral notes of rosé.
- White vinegar: Classic trick for velvet cakes, reacting with cocoa and leavening for that signature texture.
- Pink food coloring gel: Start small and build; it’s surprisingly potent, and you can always add more.
- Cream cheese: Softened to a gentle cream for smooth, tangy frosting that’s not too sweet.
- Powdered sugar: Sift to avoid lumps and achieve a cloudlike frosting consistency.
- Heavy cream: For a glossy, pourable gold drip on the cake edge.
- White chocolate chips: Melts smoothly for drip—go slow and stir well to avoid scorching.
- Edible gold luster dust and vodka (or clear extract): Creates that painterly finish (don’t worry, the alcohol evaporates quickly).
- Edible flowers, gold leaf, or berries: Optional, but these final touches make your cake truly swoonworthy.
Tired of Takeout? 🥡
Get 10 meals you can make faster than delivery arrives. Seriously.
One email. No spam. Unsubscribe anytime.
Instructions
- Prep those pans:
- Grease and line three 8-inch round pans—there’s a calm in this ritual, and it’s hugely satisfying when nothing sticks.
- Sift and combine:
- Whisk your flour, cocoa, leaveners, and salt together; the air that catches here makes for dreamy slices later.
- Cream for cloudiness:
- Beat the butter and sugar until you see it turn pale and fluffy—it should almost look like frosting itself.
- Eggs and aromas:
- Add eggs one by one, watching as the batter thickens and gathers a shine. Pour in vanilla for that heady, comforting scent.
- Splash in the rosé:
- Mix in buttermilk, rosé wine, and vinegar slowly; the mixture may look a little wonky but comes together magically.
- Blush it up:
- Add pink gel, just a touch at first, gently swirling until it’s the perfect soft hue you can’t help but smile at.
- Divide and bake:
- Pour evenly into pans—it’s okay if you eyeball it. Bake 30–35 minutes, testing with a toothpick; the kitchen will smell lightly floral and buttery.
- Cooling pause:
- Let cakes cool in their pans for 10 minutes, then coax out onto wire racks; patience here means beautifully intact layers.
- Frosting time:
- Beat softened butter and cream cheese until velvet smooth, then gradually add powdered sugar and splash in rosé and vanilla for the blushiest, fluffiest finish.
- Layer and chill:
- Stack cakes with frosting between, wrap in a crumb coat, and chill—it’s the secret to a sharp, elegant finish.
- Final frost:
- Frost fully with the remaining creaminess, smoothing as you chat or cue up a playlist for confidence.
- Prepare the gold drip:
- Melt white chocolate with cream slowly, stirring to a glossy shine, then let it cool to room temp before letting it drip like golden ribbons down the cake’s edge.
- Paint it gold:
- Mix luster dust with vodka for your edible paint; carefully swipe it over the chocolate drips with a brush—it feels a little decadent every time.
- Chill and serve:
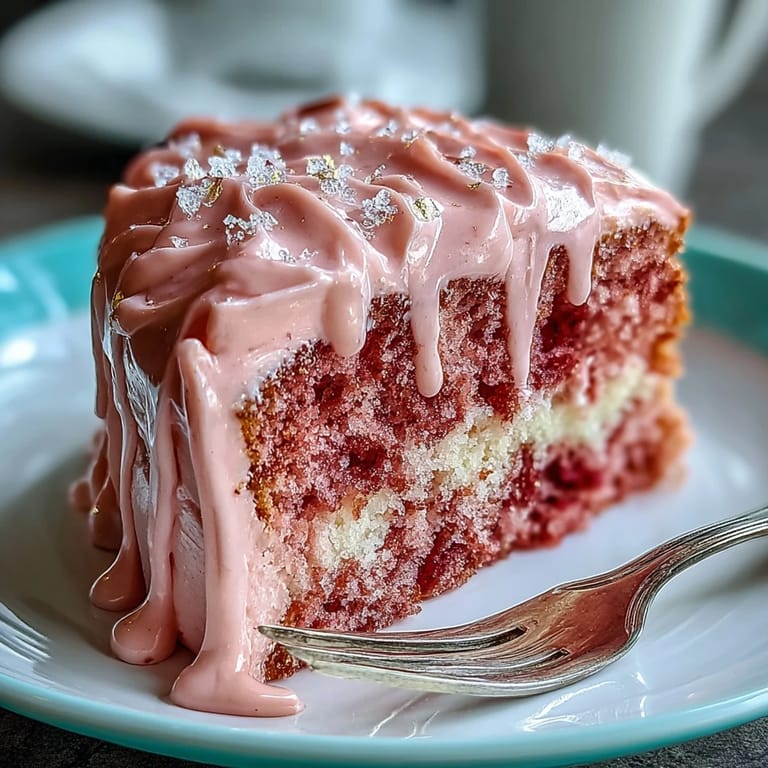
- Let the finished cake set in the fridge for at least 30 minutes before slicing to show off those pretty pink layers.
 Save It
 My favorite memory is when the bride, mid-toast, turned and whispered that this cake felt ‘like a hug draped in gold.’ In that moment, all the pink-tinged fingerprints on my apron felt totally worth it.
Decorating with Confidence
Don’t worry if your drip isn’t perfectly even—imperfections add charm, and each cake I’ve made has its own personality. Layering edible flowers or berries hides any wobble, and guests are more impressed than you’ll ever imagine by something homemade and sparkling. Relax and pretend you’re painting something fleeting and fun, not aiming for bakery perfection.
Serving Suggestions to Make It Special
For a spring brunch, serve each slice with fresh berries tumbled alongside. If there’s rosé left, pour a glass alongside for a double celebration. A few edible petals or a sprinkle of gold leaf at the table turn dessert into a centerpiece moment.
Troubleshooting for Real Kitchens
Sometimes cakes crack or layers come out a bit uneven; don’t panic, frosting covers a multitude of mishaps. Keep your layers chilled before stacking to keep things neat. If the gold drip sets too quickly, gently warm your spoon and try again—you’ll get it!
- If your frosting feels loose, chill it briefly before spreading.
- Let cakes cool completely before frosting to avoid melting layers.
- Always taste your rosé before baking—it’s your star ingredient.
 Save It
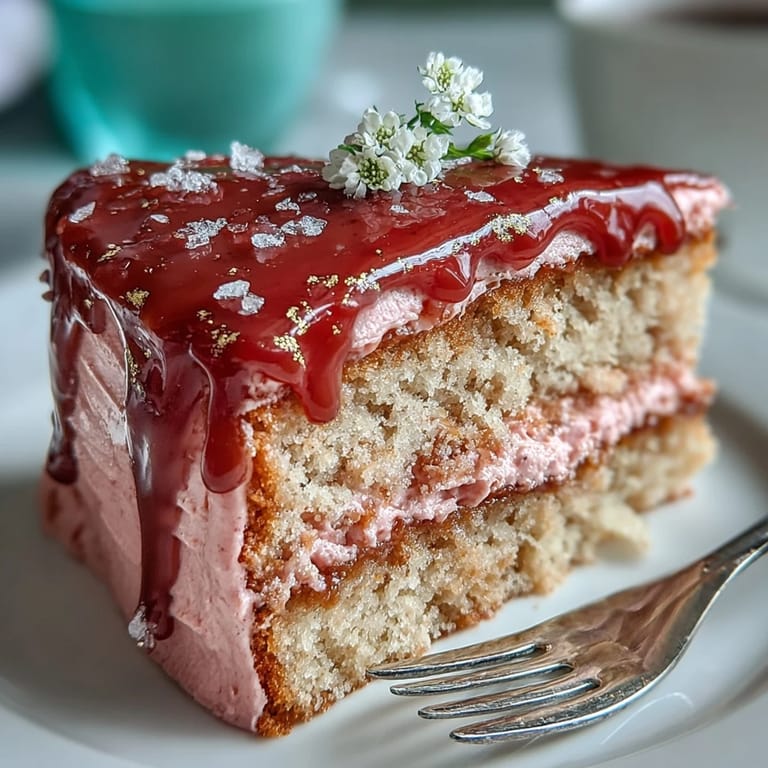
 Serve this cake with a little ceremony and a lot of laughter—every shimmer on its top is a promise of good things to come. Here’s to rosy memories, golden edges, and cakes that steal the spotlight.
Common Questions About Recipes
- → How can I intensify the rosé flavor without making layers soggy?
Brush cooled layers sparingly with reserved rosé or a rosé syrup; apply a thin soak so the crumb benefits without becoming wet. You can also fold a little reduced rosé into the frosting for a more pronounced note while keeping texture intact.
- → What non-alcoholic alternatives capture the same flavor?
Use sparkling grape juice or concentrated white grape juice with a splash of lemon to mimic acidity. Reduce the juice slightly to concentrate flavor before brushing, or add a teaspoon to the frosting to carry the rosé character.
- → How do I get a smooth, even gold drip on the edges?
Warm white chocolate with cream to a pourable but not hot consistency; cool until slightly thickened so drips hold shape. Apply with a spoon or squeeze bottle, let set, then mix edible gold luster dust with vodka or clear extract and paint over the hardened drip for a polished finish.
- → What steps ensure clean layers and minimal crumbs?
Cream butter and sugar until light, avoid overmixing after adding dry ingredients, and chill layers before leveling. Apply a thin crumb coat, chill until firm, then finish with the final frosting to lock crumbs in place for smooth sides.
- → How should I store and serve this cake for best texture and flavor?
Store chilled in an airtight cake carrier for up to 3 days. Remove from fridge 20–30 minutes before serving to let the buttercream soften and rosé aromatics come forward. For longer storage, freeze undecorated layers wrapped tightly and assemble later.
- → Can I adapt the components for common allergies or dietary needs?
Use dairy-free butter and cream cheese alternatives and a stable plant-based cream for the drip. For a gluten-free version, choose a trusted all-purpose gluten-free flour blend and add a binder like xanthan gum; expect slight changes to crumb and bake time.