 Save It
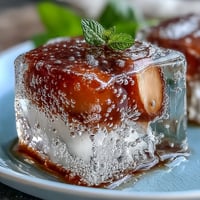
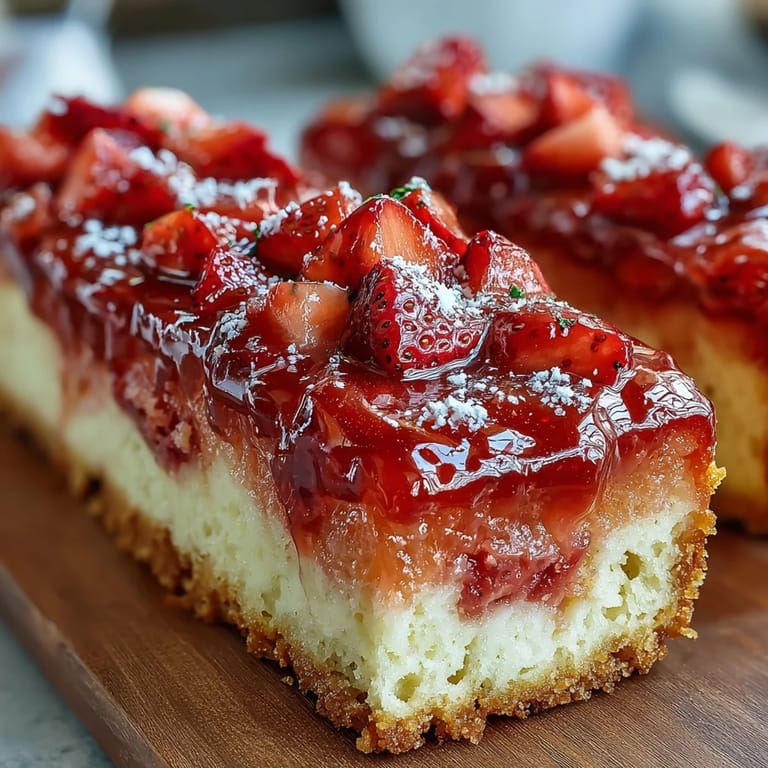
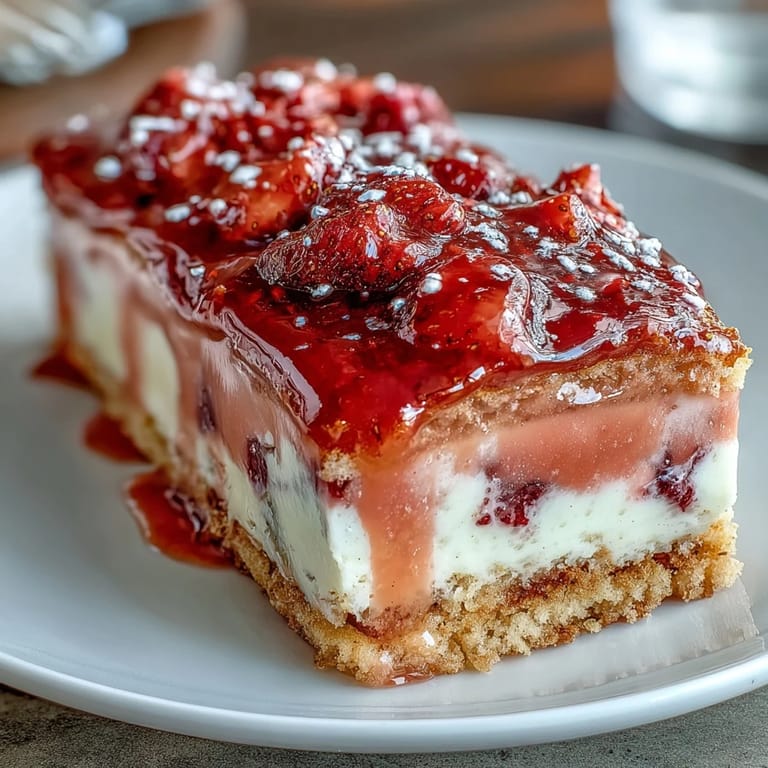
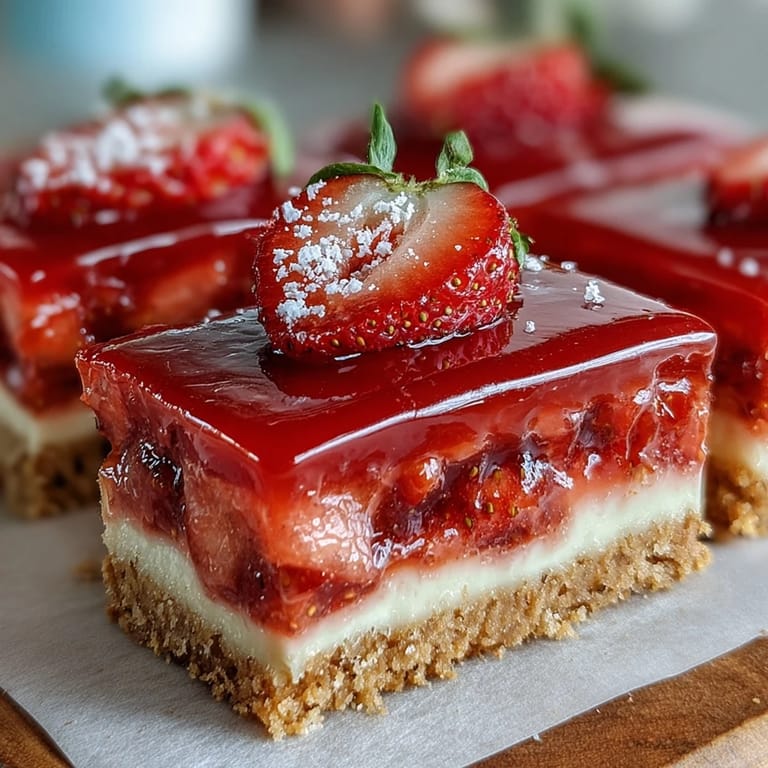
 My neighbor showed up at my door one afternoon with a punnet of strawberries so perfect I almost didn't want to eat them, but she insisted I bake something to share at the block party that weekend. I'd been craving something bright and citrusy, so I started playing around with lemon bars—the classic kind—and thought, what if strawberries lived there too? These bars became the thing people asked about all summer long, and now they're the first thing I make when spring berries hit the market.
I made these for my daughter's school bake sale, and a parent actually came back asking if I'd teach her the recipe because her kids wouldn't stop talking about them. That's when I realized these bars had staying power—they weren't just a pretty dessert, they were genuinely craveable in a way that surprised me.
Ingredients
- Unsalted butter (1 cup, softened): Room temperature butter creams better and won't incorporate lumps—take it out of the fridge about 30 minutes before you start.
- Granulated sugar (1/2 cup for crust, 1 cup for filling): The sugar in the crust helps create that sandy, tender shortbread texture, while the filling sugar balances the tartness of the lemon.
- All-purpose flour (2 cups for crust, 1/3 cup for filling): The crust flour needs just a light hand—overworking it makes the shortbread tough instead of crumbly.
- Fresh strawberries (1 cup, hulled and diced): Use the ripest berries you can find; they puree smoother and taste more vibrant than underripe ones.
- Freshly squeezed lemon juice (1/3 cup): Bottled juice won't give you that bright, fresh flavor that makes these bars sing.
- Lemon zest (1 tbsp, finely grated): This adds little bursts of lemon oil throughout the filling—don't skip it or use that pre-jarred stuff.
- Large eggs (3): They help set the custard-like filling and add structure.
- Salt (1/4 tsp in crust, 1/4 tsp in filling): Salt amplifies the sweetness and makes the tartness pop without tasting salty.
- Powdered sugar (for dusting): A light dusting at the end gives these an elegant, inviting finish.
Tired of Takeout? 🥡
Get 10 meals you can make faster than delivery arrives. Seriously.
One email. No spam. Unsubscribe anytime.
Instructions
- Heat the oven and prep your pan:
- Get your oven to 350°F and line an 8x8-inch pan with parchment paper, leaving some overhang on the sides—this makes lifting the finished bars out so much easier, and you won't accidentally tear them.
- Make the shortbread crust:
- Cream the softened butter and sugar together until it looks light and fluffy, then add the flour and salt and mix just until a soft dough comes together. You want to stop mixing the moment everything is incorporated, or the shortbread will turn tough.
- Bake the crust until golden:
- Press the dough evenly into the bottom of the pan, smooth the top with your fingers or the bottom of a measuring cup, and bake for 18–20 minutes until it's lightly golden around the edges. The crust should still feel a little soft in the center—it will firm up as it cools.
- Prepare the strawberry filling while the crust bakes:
- Puree the fresh strawberries until completely smooth, then strain through a fine sieve if you want to remove the seeds for a silkier texture (this is optional but worth doing if you have a sieve). In a large bowl, whisk the eggs with the sugar until the mixture is pale and thick, then add the lemon juice, lemon zest, and strawberry puree and whisk until fully combined.
- Add flour and salt to the filling:
- Whisk in the flour and salt until the filling is smooth with no lumps—this is what will help it set properly in the oven.
- Pour filling over hot crust and bake:
- Remove the crust from the oven and carefully pour the filling over it while the crust is still warm, which helps it adhere better. Return the pan to the oven and bake for 20–22 minutes until the center is just set but still has a tiny jiggle in the very middle—don't overbake or the filling will dry out.
- Cool completely before cutting:
- Let the bars cool to room temperature in the pan on a wire rack, then refrigerate for at least 2 hours; cold bars are much easier to cut into clean squares. Using the parchment overhang, lift the entire batch out of the pan and slice into 16 even squares with a sharp knife, wiping the blade between cuts if the filling sticks.
 Save It
 The first time someone cut into these bars and the filling held its shape perfectly, I realized I'd created something that looked as good as it tasted. There's something magical about the pale pink color and the way the lemon tang makes your mouth water—it's the kind of dessert that makes people linger at the table.
Why the Crust Matters
A good shortbread crust is the foundation for everything, and I learned this the hard way after rushing through the mixing and ending up with dense, cookie-like layers instead of that delicate, crumbly texture you want. The secret is creaming the butter and sugar really well, then mixing the flour in gently and stopping the moment you see no dry flour—overworking develops gluten, which makes shortbread tough. When the crust is done right, it stays crisp underneath the custardy filling and gives you that contrast in texture that makes these bars special.
Fresh Lemon Juice Makes All the Difference
I once tried making these with bottled lemon juice because I was in a hurry, and the bars tasted flat and one-dimensional compared to the bright, alive flavor of fresh-squeezed. Bottled juice has been sitting around and loses a lot of those volatile oils that make lemon taste so vibrant and fresh. Spending two minutes squeezing actual lemons gives you something that tastes like you actually made an effort, which you did, and people absolutely notice the difference.
Storage and Variations to Try
These bars keep beautifully in the refrigerator for up to 4 days in an airtight container, and I've learned they're actually better on day two or three when the flavors have had time to meld together. You can swap out the strawberries for raspberries if you want something a little more tart, or use blueberries for a deeper, earthier sweetness—just puree them the same way and strain if needed. The bars are also stunning when dusted with powdered sugar right before serving, which gives them a bakery-like finish that makes them look fancier than they actually are.
- Keep the parchment overhang in place while the bars cool; it protects the edges and makes lifting them out foolproof.
- If your strawberries are very watery, strain the puree in a fine sieve for a few minutes to remove excess liquid so the filling sets properly.
- These bars actually taste better chilled, so make them a day ahead if you're bringing them to a gathering.
 Save It
 These bars have become my go-to when I want something that feels special but doesn't require fussy technique or a long ingredient list. Once you make them once, they become a permanent part of your spring and summer rotation.
Common Questions About Recipes
- → How do I achieve a crisp shortbread crust?
Use cold unsalted butter and mix it gently with sugar and flour until just combined. Press the dough evenly and bake until lightly golden to get a crisp texture.
- → Can I substitute other berries for strawberries?
Yes, raspberries or blueberries can be used to create different flavor variations while maintaining the dessert’s refreshing balance.
- → What is the best way to remove seeds from the strawberry filling?
Puree strawberries and strain the mixture through a fine mesh sieve to ensure a smooth, seed-free filling.
- → How long should the bars be chilled before slicing?
Chill the bars for at least 2 hours to allow the filling to set properly for clean and easy slicing.
- → Is it necessary to dust powdered sugar on top?
Powdered sugar is optional but adds a lovely finishing touch and a slight sweetness to balance the tartness of the filling.