 Save It
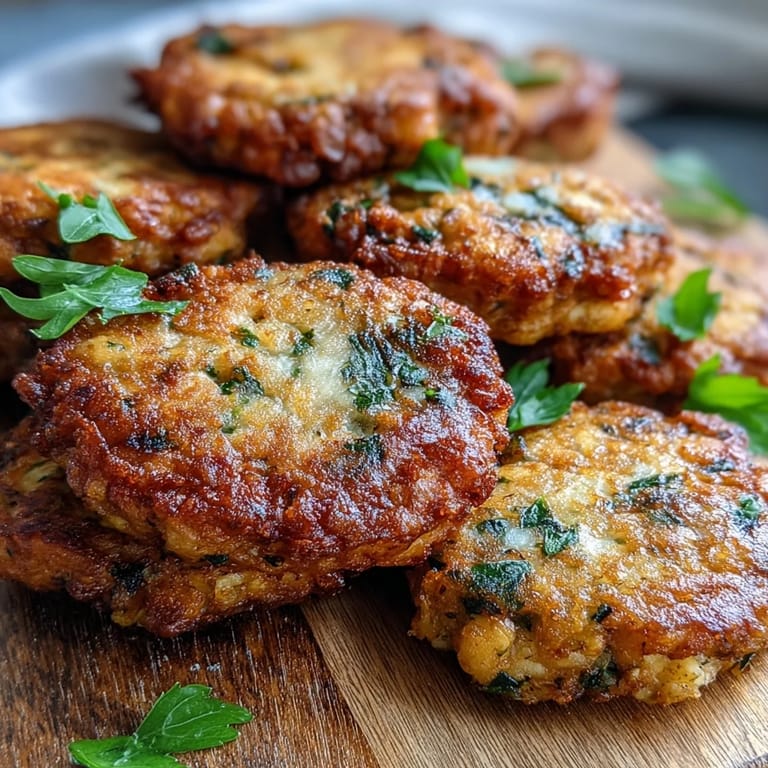
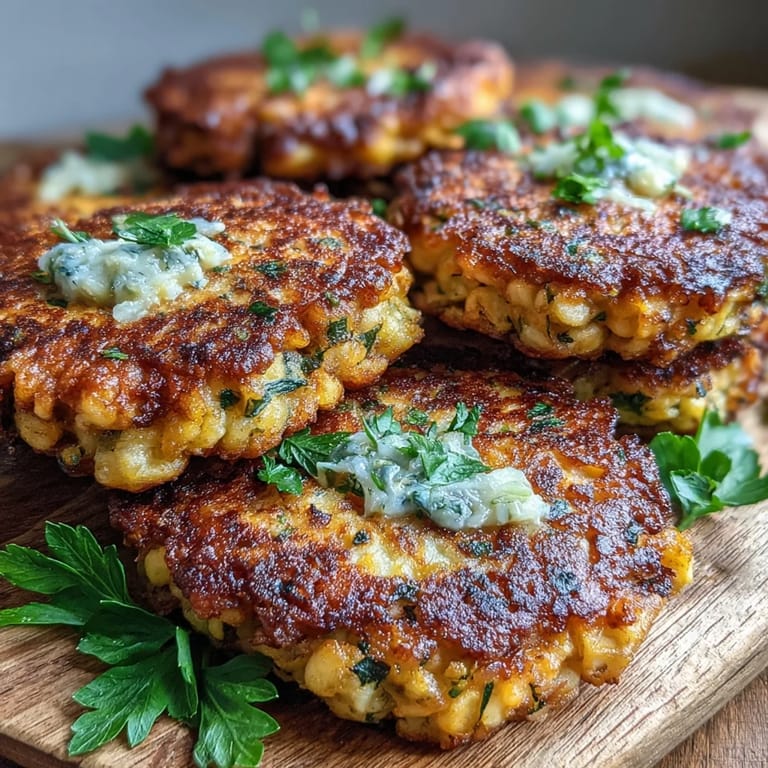
 My neighbor Marcus showed up one afternoon with a container of these fritters, still warm and practically glowing with that deep golden finish. One bite and I was completely sold—crispy on the outside, tender inside, with this earthy sweetness from the black-eyed peas that just made sense. He laughed when I asked for the recipe, saying his grandmother had been making them for decades, and now I understand why they never disappear at family gatherings. There's something magical about how simple ingredients transform into something this craveable.
I made these for a potluck last spring and watched them vanish within minutes—faster than the casseroles, faster than the salads. Someone's kid came back for thirds, and their parent looked at me like I'd performed actual magic. The best part was overhearing someone say, 'These are better than the ones from that restaurant downtown,' and just trying not to grin too hard while pretending I wasn't listening.
Ingredients
- Black-eyed peas (2 cups cooked, drained): The star that holds everything together—make sure they're fully cooked but not falling apart, and draining them well keeps your batter from getting soggy.
- Small onion (1, finely chopped): This gives you a gentle sweetness and aromatics that make each bite interesting without overpowering.
- Garlic (2 cloves, minced): Don't skip this; it adds a savory depth that makes people ask what your secret ingredient is.
- Fresh parsley or cilantro (2 tablespoons, chopped, optional): A little brightness that cuts through the richness, though honestly these work fine without it too.
- Large eggs (2): Your binder that helps everything hold together and fry up golden and crispy.
- All-purpose flour (3/4 cup): Gives structure to your fritter so it doesn't fall apart in the oil—measure it right or you'll end up with either a runny mess or something too dense.
- Salt (1 teaspoon): Brings out all the flavors hiding in those beans.
- Ground black pepper (1/2 teaspoon): Just enough bite to wake things up.
- Smoked paprika (1/2 teaspoon, optional): Adds a subtle smokiness that feels sophisticated without trying too hard.
- Cayenne pepper (1/4 teaspoon, optional): A whisper of heat—use it if you like things with personality, skip it if your crowd plays it safe.
- Vegetable oil (for frying): You need enough to create that crispy exterior without soaking your fritters, so about 1/2 inch depth in your pan.
Tired of Takeout? 🥡
Get 10 meals you can make faster than delivery arrives. Seriously.
One email. No spam. Unsubscribe anytime.
Instructions
- Mash those beans until they're mostly there:
- Take your drained black-eyed peas and work them with a fork or potato masher until they're mostly broken down but still have some texture left—total smoothness makes them gluey, and chunks make them fall apart in the oil. You want something in between that's almost a thick paste.
- Build your batter with intention:
- Add the onion, garlic, herbs if using, eggs, flour, and all your seasonings to that mashed bean situation. Stir it together until you have a thick, cohesive batter that holds together when you scoop it—it should be thicker than pancake batter but not as thick as cookie dough.
- Get your oil ready to work:
- Pour about 1/2 inch of vegetable oil into a large skillet and set it over medium heat, then wait until it's shimmering and a tiny piece of batter sizzles immediately when it hits the pan. This is your signal that everything is the right temperature.
- Fry your fritters with patience:
- Scoop heaping tablespoons of batter and gently drop them into the hot oil, using the back of a spoon to flatten them slightly into patties. Don't crowd the pan or the temperature drops and you end up with greasy fritters instead of crispy ones—work in batches if you need to.
- Get that golden color just right:
- Fry for about 2 to 3 minutes per side until they're deep golden brown and making this beautiful sizzling sound. The color tells you everything—you want that burnished gold, not pale yellow and definitely not dark brown.
- Drain them smart:
- Use a slotted spoon to transfer your fritters to a paper towel-lined plate so the excess oil drains away and they stay crispy instead of getting soggy. Serve them warm, ideally within minutes of finishing.
 Save It
 There was this moment at a dinner party where someone tried one of these and just closed their eyes for a second, and I realized that food doesn't always need to be complicated to be memorable. It just needs to be made with a little care and maybe shared with people who appreciate it.
The Texture Question
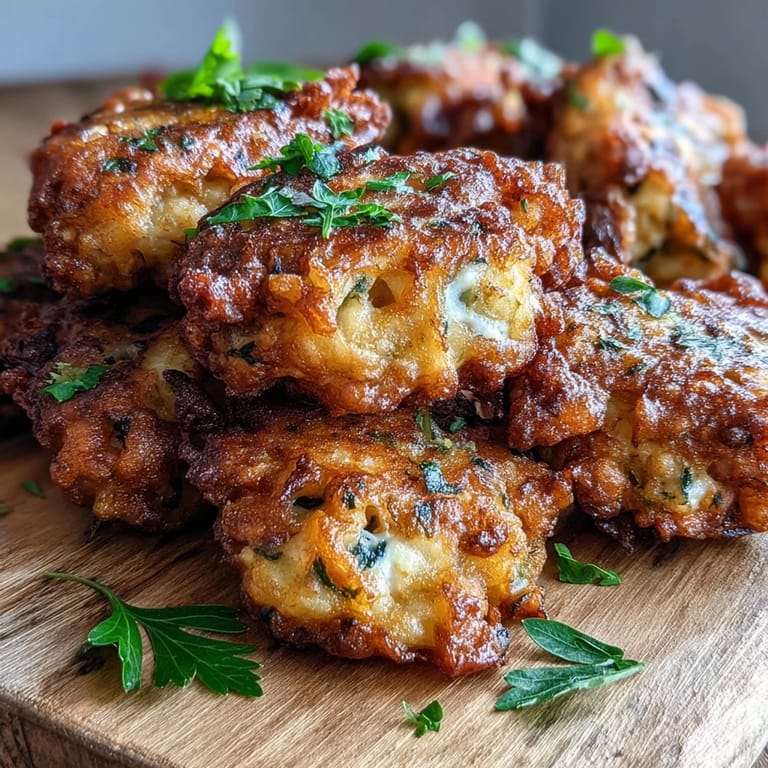
The magic here is in that contrast between the crispy exterior and the tender, almost creamy inside. When you bite through that crackling edge, you get this satisfying give-way moment where the warm bean filling comes through. It's the kind of texture that makes people want another one before they've finished the first.
Flavor Combinations Worth Exploring
These fritters play well with almost anything—you can dress them up or keep them simple depending on your mood. I've done a yogurt-cilantro dip, a hot sauce situation, even mango chutney, and every version felt right for a different occasion. The beauty is that the base is flavorful enough to stand alone, but flexible enough to complement whatever you're pairing it with.
Making Them Your Own
Once you get comfortable with the basic fritter, the variations practically suggest themselves. Try adding a pinch of cumin if you want something earthier, throw in some scallions for freshness, or experiment with different dipping sauces until you find your favorite combination.
- Swap the all-purpose flour for chickpea flour to make them gluten-free—they actually get a nuttier flavor this way.
- Make the batter ahead and refrigerate it for up to a day, which gives the flavors time to meld and makes them even more convenient.
- Double the batch and freeze the uncooked fritters on a sheet tray, then fry them straight from frozen—they take about an extra minute per side.
 Save It
 These fritters have become my go-to when I want to impress people without actually stressing in the kitchen. Make them once and they'll probably become something you keep coming back to.
Common Questions About Recipes
- → What makes these fritters crispy?
The combination of flour and eggs creates a batter that fries to a golden crunch. Frying in 1/2 inch of oil at medium heat ensures even cooking and that satisfying crispy exterior while keeping the inside tender.
- → Can I make these gluten-free?
Absolutely. Substitute chickpea flour or a certified gluten-free flour blend for the all-purpose flour. The texture remains excellent, and chickpea flour actually adds a subtle nutty flavor that complements the black-eyed peas.
- → What dipping sauces work best?
These fritters pair beautifully with cool yogurt dips for contrast, spicy hot sauce for heat, or sweet mango chutney for balance. A simple garlic-herb yogurt or spicy aioli also works wonderfully.
- → Can I bake instead of fry?
While frying yields the best texture, you can bake at 400°F for 15-20 minutes, flipping halfway. Brush with oil before baking to help achieve some crispiness, though they won't be quite as crunchy as the fried version.
- → How do I store leftovers?
Store cooled fritters in an airtight container in the refrigerator for up to 3 days. Reheat in a 350°F oven for 5-10 minutes to restore crispiness. Avoid microwaving as they'll become soggy.
- → Can I use canned black-eyed peas?
Yes, canned black-eyed peas work perfectly. Just drain and rinse them well before mashing. Two 15-ounce cans typically provide enough peas for this batter. Freshly cooked peas also work great if you prefer cooking from dried.