
 Save
Save
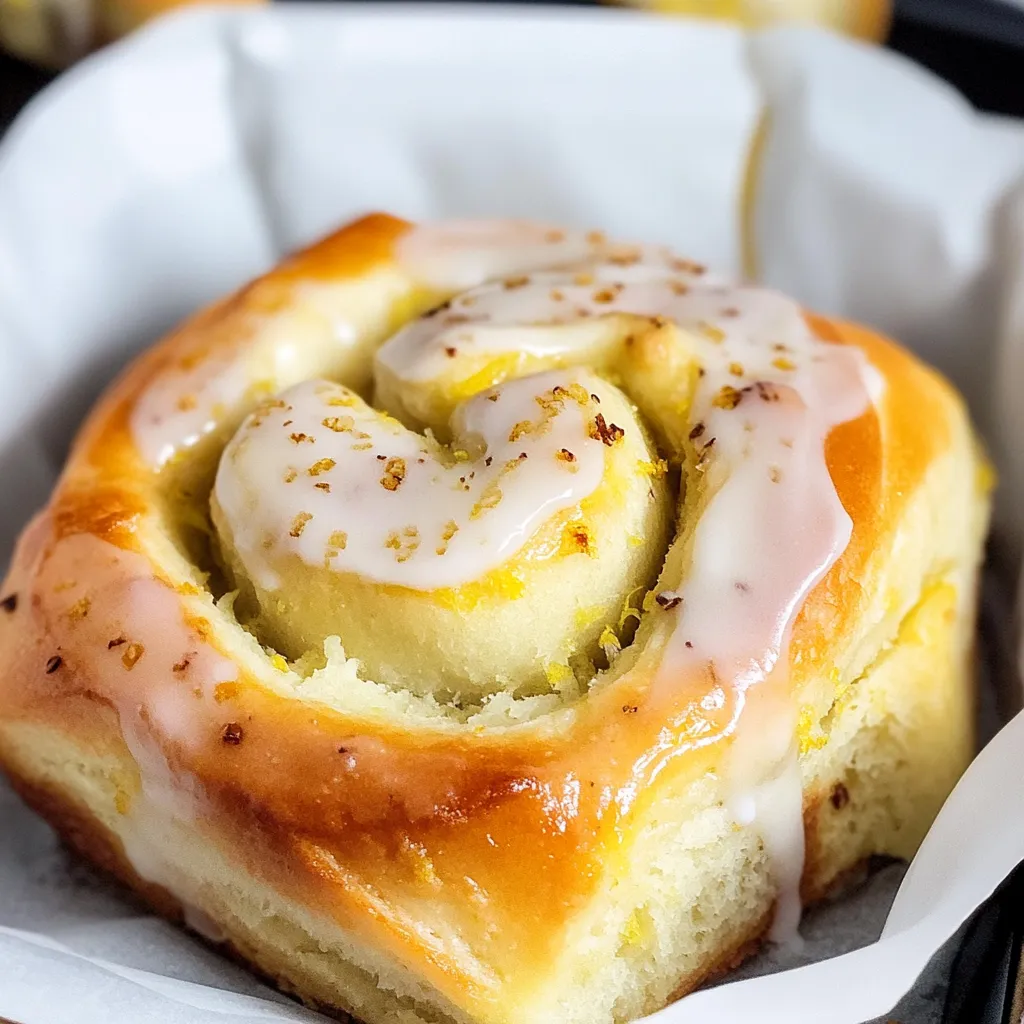
These sunshine-infused lemon rolls take your basic breakfast pastry and add a zesty twist that screams summer. The dough and filling both pack a punch with fresh lemon zest, creating multiple layers of bright flavor, topped off with a zippy lemon glaze. Don't worry about the hour and a half prep—they're totally worth carving out time for when you want to wow folks at weekend breakfasts or brunches.
I whipped these tangy rolls up for the first time at a Mother's Day gathering last spring, and now they've turned into our go-to warm-weather treat. From Easter all the way to Labor Day, my folks beg for them at every family get-together because they hit that perfect sweet-tart balance.
What You'll Need
- For the Dough: Regular flour gives you that ideal foundation for pillowy, tender rolls
- Instant dry yeast: Helps your dough rise quickly without long waiting periods
- Poppy seeds: They give a nice little crunch and pretty speckles (skip if you want, but they're worth trying)
- Buttermilk: Makes your dough extra soft (regular milk works in a pinch)
- White sugar: Sweetens things up and helps feed your yeast
- Unsalted butter: Brings richness and softness to your dough
- Fresh lemon zest: Packs your dough with sunny flavor
- Eggs: They help with structure and add richness
- For the Filling: White and light brown sugars mix to create the perfect sweetness
- Fresh lemon zest: When rubbed into the sugars, it releases amazing flavor oils
- Softened butter: Holds everything together and creates those yummy gooey spots
- For the Icing: Confectioners sugar forms your smooth, sweet topping
- Fresh lemon juice: Adds that zippy kick and real lemon taste
- Melted butter: Gives your icing a nice glossy look and rich flavor
How To Make Them
- Mix Dry Stuff First:
- Put 4¼ cups flour, instant yeast, poppy seeds (if you want them), and salt in your mixer bowl. This spreads the yeast around so everything rises evenly.
- Warm Up The Wet Mix:
- Heat your buttermilk, sugar, and butter till it's just warm and the butter's mostly melted. It should feel like bathwater on your wrist—not too hot or you'll kill the yeast.
- Start Your Dough:
- Pour the warm liquid stuff into your dry mix slowly while your mixer runs at medium. Adding it bit by bit keeps flour from flying everywhere and mixes things better.
- Get Those Eggs In:
- Add eggs one after another, making sure each one mixes in completely before adding the next. This makes your dough smooth. Then mix in all that lemon zest until it's spread throughout.
- Nail The Texture:
- Sprinkle in more flour a spoonful at a time until the dough pulls away from the bowl. It should feel slightly tacky but not actually stick to your finger when you touch it.
- Give It A Break:
- Cover your bowl with plastic or a kitchen towel and let it sit for 10-20 minutes. This helps the gluten chill out so your dough won't spring back when you roll it.
- Get That Filling Ready:
- Mix both sugars with fresh lemon zest, rubbing it between your fingers to get those oils out. The smell is amazing! Then mix in the soft butter until everything's combined.
- Roll It Out:
- On a lightly floured counter, roll your dough into a big 12×18 inch rectangle about ½ cm thick. Spread your lemony filling all over, but leave a half-inch strip along one long edge bare so you can seal it up.
- Shape The Rolls:
- Roll the dough up from the long side toward that bare strip, keeping it tight. Cut into 12 even pieces using dental floss—just slide it under, cross the ends over top, and pull tight.
- Let Them Grow:
- Put rolls in a greased 9×13 pan, cover with foil, and stick them in a warm (but turned OFF) oven for about 30 minutes. This gives them the perfect spot to rise. Then take them out, turn the oven to 350°F, and bake for 28-32 minutes till golden.
- Top Them Off:
- Mix powdered sugar, fresh lemon juice, and melted butter until smooth. Pour this over your slightly cooled rolls so it can seep into all the nooks. Sprinkle extra lemon zest on top for an extra flavor boost.
The best part of making these rolls has to be when I rub the zest into the sugar for the filling. The smell that fills my kitchen is just incredible—I always find myself taking big sniffs to enjoy that bright, fresh scent. It's like bottling up sunshine.
Overnight Option
You can easily prep these rolls ahead of time. After cutting and placing them in your baking dish, just cover them tightly with plastic wrap and stick them in the fridge overnight. The cold slows down the yeast but doesn't stop it completely. In the morning, take them out about 1-2 hours before you want to bake so they can warm up and finish rising. This trick is perfect for holidays or when you've got company coming—most of the work is done the day before.
Fixing Common Problems
If your dough feels too sticky even after adding more flour, don't dump in loads more. Instead, try using a bit of oil on your hands to work with it. Too much flour will make your rolls heavy and dry. When rolling out the dough, a bench scraper helps lift it if it sticks to your counter. For the filling, make sure your butter is really soft—if it's not, you might tear the dough trying to spread it. You can pop it in the microwave for 5-10 seconds to soften it a bit more without fully melting it.
What To Serve With Them
These zesty rolls taste amazing with a handful of fresh berries on the side—the fruit really complements the lemon flavor. For a fancy brunch, serve them alongside herb-flecked scrambled eggs and a glass of mimosa made with freshly squeezed orange juice. If you're having them for dessert, try adding a scoop of vanilla ice cream on top of a warm roll for an incredible treat. Want to make them look extra fancy? Arrange them on a white plate and add thin lemon slices and a few mint leaves as garnish.
Common Questions About Recipes
- → Can I prep lemon rolls the night before?
Absolutely, make the rolls, stick them in the fridge overnight, then let them sit out and rise for 1-2 hours before baking them in the morning.
- → Which yeast works best?
Instant yeast gives you the quickest results, but you can swap in active yeast if you don't mind waiting a bit longer for the dough to rise.
- → What's the trick for cutting rolls neatly?
Try using unflavored dental floss for super clean slices, or pop the dough in the fridge for 20-30 minutes so it firms up before cutting.
- → Will a glass pan work okay?
You can definitely use a glass dish, just turn your oven down to 325°F (162°C) so the rolls don't cook too fast on the outside.
- → How do I keep leftover rolls fresh?
Put them in a sealed container and they'll stay good for up to 3 days on your counter, or tuck them in the fridge to keep them fresh even longer.