 Save It
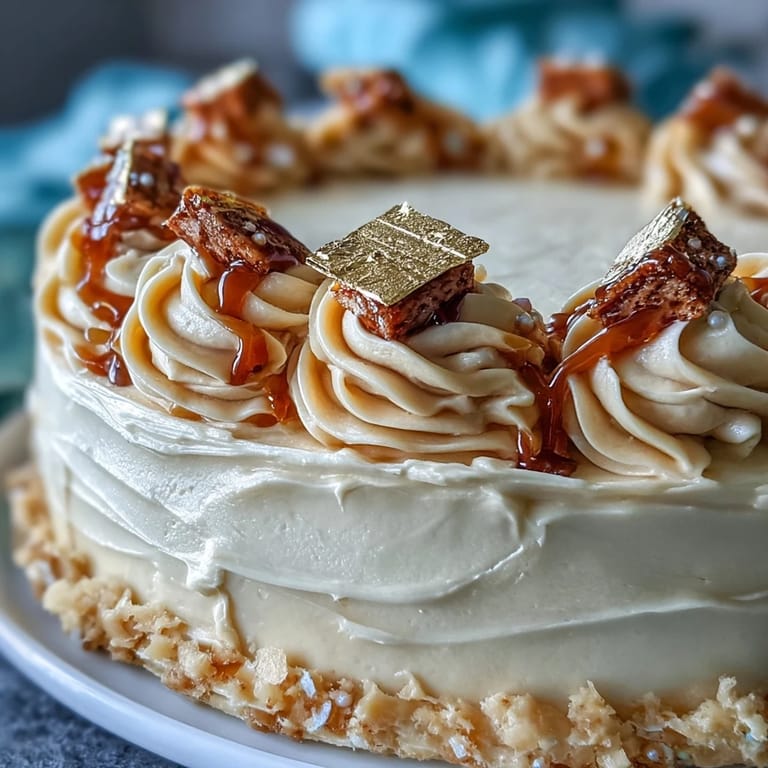
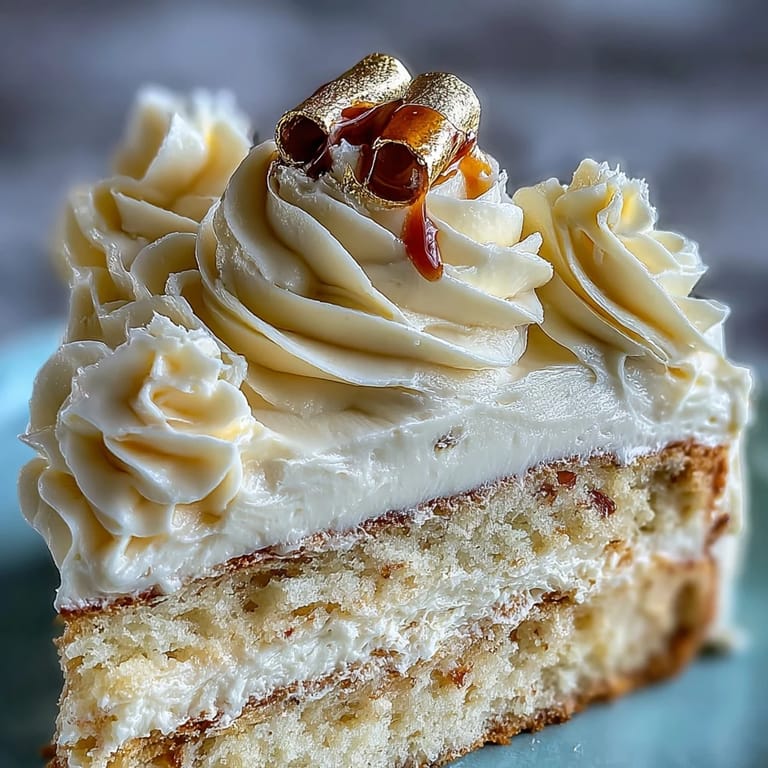
 My daughter called me three weeks before graduation with barely contained excitement, already talking about cake designs she'd pinned online. I found myself scrolling through photos at midnight, mesmerized by the way edible gold catches light under celebration chandeliers. Something about baking a cake specifically for this milestone felt different from birthday cakes or holiday desserts—this one needed to feel momentous without being fussy, elegant without pretension. When I settled on vanilla sponge with that touch of gold foil, I knew I'd found the right balance of festive and timeless.
I'll never forget standing in the kitchen at 7 a.m. on graduation morning, frosting this cake while my daughter showered upstairs, and catching my reflection in the kitchen window—flour in my hair, buttercream on my apron, and the biggest smile on my face. By the time she came downstairs, the diploma topper was in place and I was carefully positioning those delicate gold sheets with tweezers, and she hugged me from behind without saying anything. That's when I realized this cake had become part of the memory itself, not just the backdrop.
Ingredients
- All-purpose flour (2 ½ cups): The structure of this cake depends on proper measuring—spoon and level rather than scooping, or you'll end up with a too-dense crumb that won't rise properly.
- Baking powder (2 ½ tsp): This is what gives you that feather-light, celebratory crumb; make sure yours isn't expired or you'll lose the lift.
- Unsalted butter (1 cup for cake, 1 ½ cups for frosting): Room temperature is non-negotiable here—cold butter won't incorporate air, and you need that airiness for both the sponge and the frosting.
- Granulated sugar (2 cups): This dissolves into the butter and creates the tender crumb structure that makes this cake so appealing.
- Eggs (4 large): Room temperature eggs emulsify properly and create a more stable batter—take them out of the fridge at least an hour before baking.
- Vanilla extract (1 tbsp for cake, 2 tsp for frosting): Use real vanilla if you can; the difference in flavor is especially noticeable in something this simple.
- Whole milk (1 cup for cake, 3–4 tbsp for frosting): Room temperature milk prevents the batter from seizing when combined with the warm butter mixture.
- Powdered sugar (5 cups): Sift this before measuring to avoid lumps that create a grainy frosting.
- Edible gold foil sheets: Handle these with completely dry hands or tweezers—even a hint of moisture will cause them to tear or stick to your fingers uselessly.
- Diploma-shaped topper: You can buy these pre-made, or make one from fondant with edible markers for something more personalized.
Tired of Takeout? 🥡
Get 10 meals you can make faster than delivery arrives. Seriously.
One email. No spam. Unsubscribe anytime.
Instructions
- Prepare your pans with intention:
- Preheat your oven to 350°F and take a moment to properly grease and line your pans—this prevents sticking and makes turning out the cakes so much cleaner. Use parchment paper circles cut to fit the bottom, which saves frustration later when you're trying to get the layers onto your serving plate.
- Build the dry ingredients:
- Whisk flour, baking powder, and salt together in a medium bowl, making sure the baking powder is evenly distributed throughout—lumps here mean uneven rising. This small step prevents streaks of unmixed leavening agent that would create weird dense pockets.
- Cream butter and sugar until it transforms:
- Beat softened butter and sugar together on high speed for 3 to 4 minutes until it's noticeably lighter in color and fluffy—you're incorporating air that will help the cake rise. Listen for the mixer to change sound; when it gets quieter and fluffier, you're there.
- Add eggs with patience:
- Add one egg at a time, beating well after each addition so each one fully incorporates before the next arrives. This prevents the batter from looking broken or separated.
- Fold in the dry ingredients carefully:
- Alternate adding the flour mixture and milk, starting and ending with flour—this prevents overmixing, which would develop gluten and create a tough cake. Each addition should just combine before the next one joins in.
- Divide and smooth:
- Pour batter evenly between prepared pans and use an offset spatula to smooth the tops—even batter distribution means even baking and level layers. You'll thank yourself when frosting a cake with flat surfaces.
- Bake with awareness:
- Bake for 28 to 32 minutes until a toothpick inserted in the center comes out clean with just a few moist crumbs. Every oven behaves differently, so start checking at 25 minutes to get familiar with yours.
- Cool with patience:
- Let cakes cool in pans for 10 minutes to set slightly, then turn out onto wire racks to cool completely—rushing this step means a warm cake that falls apart when frosted. This is a perfect moment to start the buttercream.
- Make silky buttercream:
- Beat softened butter on high speed for about 3 minutes until it's pale and creamy, then gradually add sifted powdered sugar to avoid lumps. Add vanilla, salt, and milk a tablespoon at a time until you reach a spreadable consistency—it should be smooth and glossy.
- Assemble with a crumb coat first:
- Place one cooled layer on your serving plate, spread a thin layer of buttercream on top, and set the second layer on top—make sure both layers are level before proceeding. Apply a thin crumb coat around the entire cake and chill for 30 minutes to seal in loose crumbs.
- Frost the cake to smoothness:
- After chilling, apply the remaining buttercream in smooth, even strokes using an offset spatula—a turntable makes this easier, but it's not essential. Take your time here; you're not racing, and smoothness is what makes the gold foil look elegant.
- Apply gold foil with tweezers and intention:
- Using clean, dry tweezers, carefully pick up small pieces of edible gold foil and position them on the cake where desired—your hands must be completely dry or the foil will shred and stick. The foil is delicate but creates a stunning effect even with imperfect placement.
- Crown it with the diploma:
- Place your diploma topper at the center or slightly to the side of the cake once the frosting is set. If using the homemade fondant version, let the edible markers dry before placing it to prevent smudging.
- Final chill and serve:
- Give the finished cake a brief chill to set everything, then bring it to room temperature about 20 minutes before serving—cold cake tastes a bit muted. The buttercream firms up beautifully this way and is easier to cut into clean slices.
 Save It
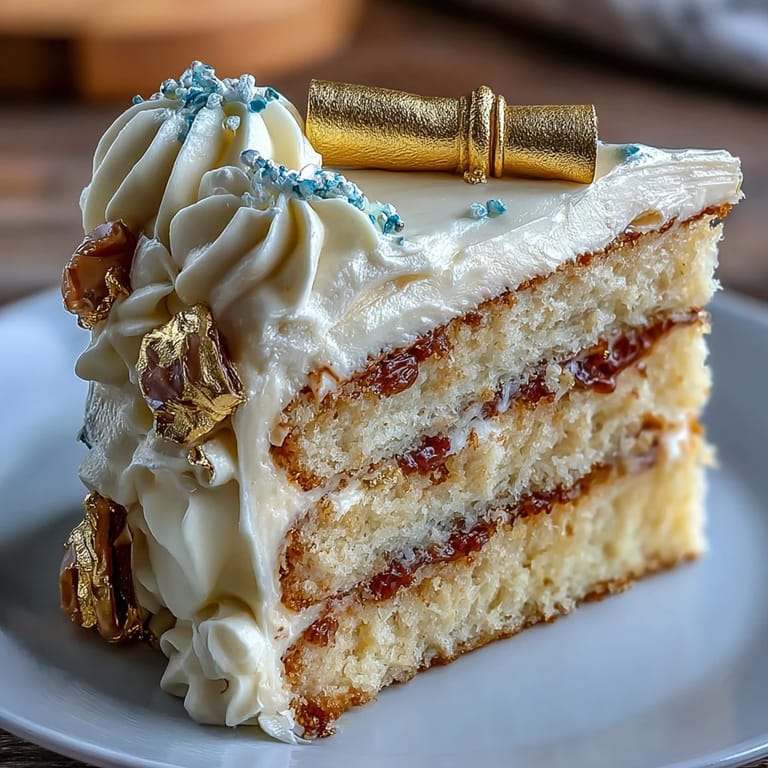
 Later that evening, after everyone had gone home and the cake box was nearly empty, my daughter showed me a photo she'd taken of it from above—just a slice of the frosted surface with that gold foil catching light from the dining room chandelier. She sent it to her best friends with the caption 'still can't believe high school is over,' and in that moment, I realized the cake had done exactly what celebration food is supposed to do: hold the feeling of a specific time in a specific life, preserved in sweetness and buttercream.
When to Bake This Cake
This cake deserves a moment when you want to mark something significant—graduation, certainly, but also the end of a school year, a big promotion, or any transition that needs honoring. I've also made it for end-of-season celebrations and teacher appreciation events, anywhere that calls for something elegant but not stuffy. The beauty is that it looks like you spent all day on it, but the timing works even if you bake the day before and decorate the morning of the event.
Flavor Variations That Feel Personal
The vanilla sponge is the perfect canvas for customization without becoming complicated. If your graduate loves almond flavoring, a teaspoon of almond extract mixed into the cake batter adds sophisticated depth. For a lemon lover, add the zest of two lemons and replace half the milk with fresh lemon juice, then add a touch of lemon extract to the frosting—it becomes bright and celebratory without overwhelming. You can also tint the buttercream with gel food coloring to match school colors, which I did by using the school's exact shade of blue in the frosting for extra personalization.
The Gold Foil Finishing Touches
The gold foil is what elevates this from a lovely cake to a show-stopping centerpiece, but it requires a gentle touch and completely dry conditions. Apply it after the final frosting layer is set and you've moved the cake to its final serving location—moving a foil-decorated cake risks the pieces shifting or detaching. I learned this the hard way when I tried to move the cake to the dining room and several sheets slid slightly, creating an accidentally abstract pattern that actually looked intentional. The upside: edible gold foil is forgiving, and even imperfect application reads as intentional glamour from across a room.
- Keep a small extra piece of gold foil aside in case you need to do touch-ups or cover any spots that shifted during transport.
- If you prefer a different look, consider edible pearls, small fondant stars, or metallic dust mixed with a clear extract to brush on instead of foil.
- The diploma topper can be made fully edible using fondant rolled thin and cut with a small knife, then decorated with edible markers for something that photographs beautifully.
 Save It
 This cake sits at the intersection of simple and stunning, which is exactly where celebration food should live. Make it with presence, knowing that you're not just baking—you're marking a moment worth honoring with something beautiful and delicious.
Common Questions About Recipes
- → What type of flour is best for this cake?
All-purpose flour provides the ideal balance of structure and texture for a tender vanilla sponge.
- → How do I apply the edible gold foil without tearing it?
Use tweezers to gently handle the delicate gold foil, ensuring dry hands to avoid moisture-related damage.
- → Can I customize the frosting color?
Yes, adding gel food coloring to the buttercream allows you to match colors for themed celebrations.
- → What’s the best way to achieve a smooth frosting finish?
Apply a crumb coat and chill before adding the final frosting layer for a polished, smooth surface.
- → Are there recommended drink pairings?
Pair this cake with sparkling cider or champagne to complement its sweet, rich flavors.