 Save It
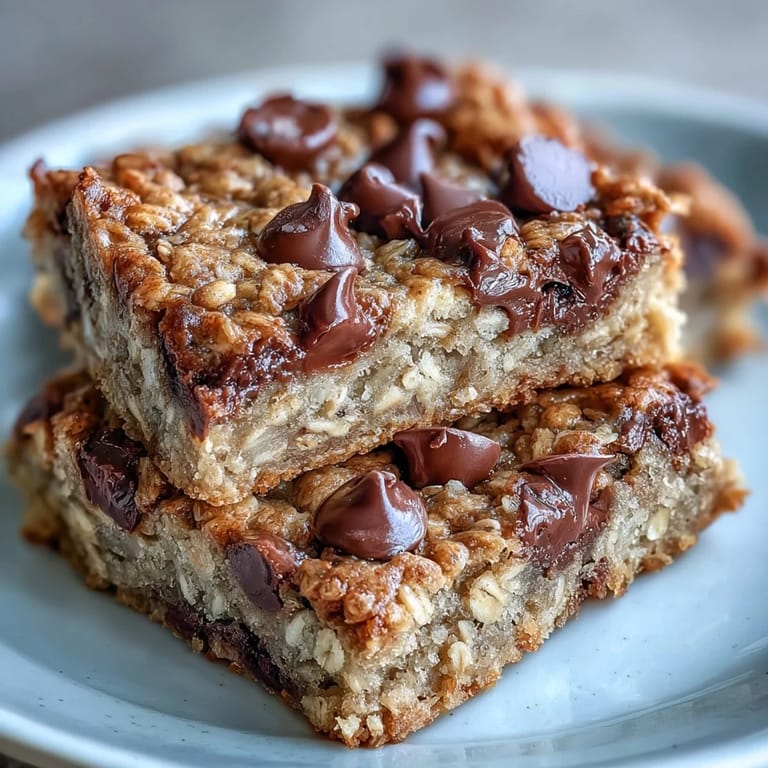
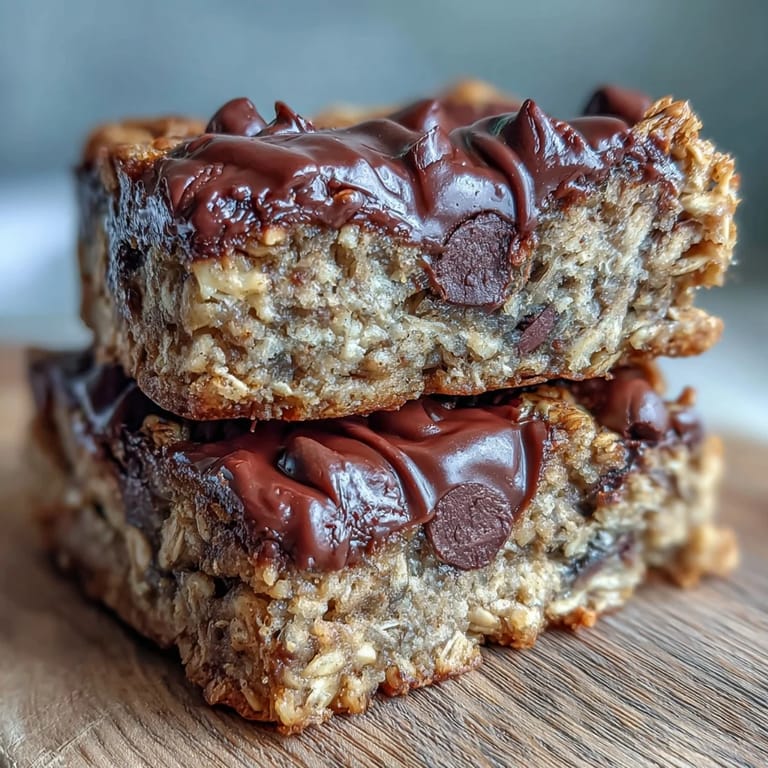
 My partner came home from the gym one morning complaining about the staleness of store-bought breakfast bars, and I realized I'd been buying the same overpriced boxes for months without questioning why. That afternoon, I mashed three bananas on a whim, stirred them into some oats with maple syrup, and baked the whole thing down into squares that tasted nothing like the rubbery protein nonsense I'd been eating. These banana baked oatmeal bars became my answer to convenience without the guilt, and now I can't imagine starting my week any other way.
I brought a batch to my sister's house last spring, still warm from the oven and wrapped in foil, and watched three people who "don't eat healthy snacks" demolish half the pan in minutes. That's when I knew this recipe was actually good, not just good-for-you—there's a real difference.
Ingredients
- Rolled oats (2 cups): The foundation that keeps these chewy and substantial; don't use instant oats or they'll turn into mush, and don't skip them because they're what holds everything together.
- Mashed ripe banana (1 1/3 cups): This is your binder and sweetness in one, so use bananas that are spotted brown and soft—green ones won't mash smoothly and won't taste as sweet.
- Pure maple syrup, agave, or honey (3 tbsp): Pick whichever you have on hand; they each bring slightly different depth, and maple is my default because it doesn't overpower the banana.
- Oil or nut butter (3 tbsp): This keeps the bars from drying out, and I alternate between coconut oil for a subtle flavor and almond butter when I want richness.
- Water (6 tbsp): Balances the mixture so it's spreadable but not soupy; if you use thicker nut butter, reduce the water slightly.
- Vanilla extract (1 tsp): A small pour that makes everything taste more like itself, not just vanilla but a deeper version of banana.
- Salt (1/2 tsp): Don't skip this—it brightens the sweetness and makes the whole thing more interesting.
- Optional mix-ins (1/3 cup): Chocolate chips, chopped nuts, dried cranberries, or seeds are all excellent; add them in at the end so they stay distinct.
Tired of Takeout? 🥡
Get 10 meals you can make faster than delivery arrives. Seriously.
One email. No spam. Unsubscribe anytime.
Instructions
- Heat your oven and prep the pan:
- Set the oven to 350°F and line an 8-inch square pan with parchment paper or just grease it really well. This step takes two minutes and saves you from scraping dried oatmeal off the bottom later, which trust me, I've done.
- Combine the dry team:
- Mix the oats and salt in a big bowl—this seems pointless but it distributes the salt evenly instead of having bitter pockets. Use a whisk or just your fingers to break up any clumps.
- Bring the wet ingredients together:
- In the same bowl, stir in the banana, water, sweetener, oil, and vanilla, mixing until everything looks combined and there are no dry oat streaks. The texture should be thick but pourable, like a loose cookie dough.
- Add your special touches:
- Fold in chocolate chips, nuts, or whatever you're using—this is where you make it yours. I usually scatter some on top too for extra visual appeal and that little crunch.
- Spread and smooth:
- Pour everything into the pan and use a spatula to press it into an even layer. Don't go wild; just make sure there aren't thick corners and thin middles.
- Bake with intention:
- Slide it into the oven for exactly 20 minutes—the edges will look set but the center will still have a tiny wobble, which is perfect. Then turn off the heat and leave the door shut for 5 more minutes; this gentle residual heat sets them without making them cakey.
- Cool and cut:
- Let them cool completely on the counter (this takes patience, but cutting them warm means they'll fall apart). Once cool, slice into 6 big bars or 9 smaller ones depending on your appetite.
 Save It
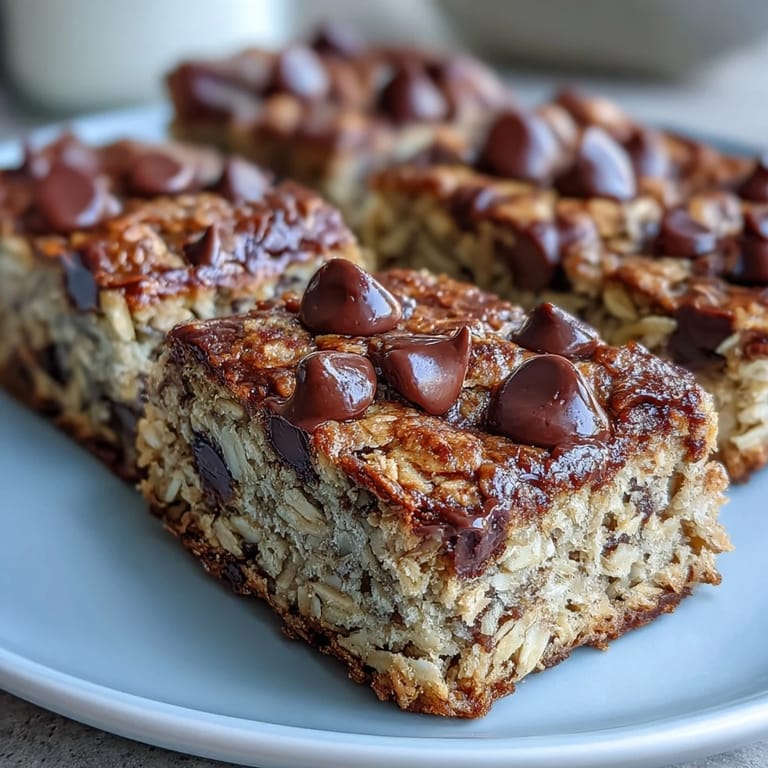
 These bars have become my solution for the 3 p.m. slump when I want something real, not another coffee—and they've somehow made healthy eating feel less like deprivation and more like self-care. My coworkers now ask when I'm bringing them again, which is its own kind of compliment.
Storage and Make-Ahead Magic
Keep them in an airtight container in the fridge for up to four days, or wrap individual bars in foil and freeze them for three months. I once forgot about a stash in my freezer and rediscovered them on a random Tuesday—they thawed perfectly while I was making coffee, and it felt like a gift to myself. The beauty of batch-making these is that you can grab one straight from the freezer on mornings when you're running late and it'll thaw by snack time.
Flavor Variations That Actually Work
Swap the banana for unsweetened applesauce if you want something lighter and slightly spiced—add cinnamon or nutmeg to complement it. Pumpkin purée works beautifully too and makes the whole batch feel seasonal and cozy. I've even tried half banana and half almond butter for a protein boost, and while it was richer, it was absolutely delicious with extra thick chocolate chips stirred through.
Customization and Dietary Adjustments
These bars are naturally flexible enough to meet almost any dietary need without tasting like you're sacrificing anything. Use certified gluten-free oats if needed, swap honey for maple syrup if you're vegan, or skip nut butter entirely in favor of oil if there are allergies at your table. The recipe adapts beautifully, and I've made versions for people with different restrictions without ever feeling like I was cooking separate meals.
- For extra protein, add one scoop of protein powder and reduce the oats to 1 3/4 cups so the texture stays balanced.
- Try dark chocolate chips instead of milk chocolate for a sophisticated version, or mix in coconut flakes and dried mango for something tropical.
- If you want them extra chewy, underbake them very slightly—they'll firm up more as they cool, and the texture will be more like a brownie.
 Save It
 These bars have quietly become my favorite thing to make when I want to feel productive in the kitchen without stress. They're the kind of recipe that rewards you immediately and keeps giving through the week.
Common Questions About Recipes
- → Can I freeze these banana oatmeal bars?
Yes, these bars freeze exceptionally well. Wrap individual bars in plastic wrap and store in a freezer-safe container for up to 3 months. Thaw overnight in the refrigerator or warm in the microwave for 30-60 seconds.
- → What can I substitute for the banana?
Unsweetened applesauce or pumpkin purée work as direct substitutes for mashed banana. Both provide similar moisture and binding properties, though the flavor profile will change slightly. Use the same measurement of 1 1/3 cups.
- → How do I know when the bars are done baking?
The bars are ready when the edges are lightly golden and the center appears set. The unique method of turning off the oven and letting them rest inside for 5 minutes ensures they finish cooking through without drying out.
- → Can I make these oatmeal bars gluten-free?
Absolutely. Simply use certified gluten-free rolled oats, which are processed in facilities that avoid cross-contamination. All other ingredients are naturally gluten-free, making this an easy gluten-free breakfast option.
- → Why do I need to let them cool completely before cutting?
Cooling completely allows the bars to set firmly. If you cut them while warm, they may crumble or fall apart. The cooling time helps the oats absorb remaining moisture and creates clean slices that hold their shape.
- → How can I add more protein to these bars?
Stir in a scoop of your favorite protein powder and reduce the oats by about 2-3 tablespoons. You can also mix in chopped nuts, seeds like hemp or chia, or serve with Greek yogurt for an extra protein boost.