
 Save This
Wholesome chocolate peanut butter protein bars have become my secret weapon for busy weeks when I want a rich snack that actually satisfies. This no bake recipe brings together simple pantry ingredients in less than fifteen minutes and the swirled chocolate peanut butter topping makes every bite feel extra special. If you are craving a plant based treat that will keep you fueled between meals or after workouts these bars are about to be your go to.
The first time I made these for my partner he could not believe something this decadent was actually plant based and healthy. Now we keep a batch in the freezer for those snack emergencies that always pop up.
Ingredients
- Natural peanut butter: gives a creamy texture and classic flavor look for one made with just peanuts and salt for the best taste
- Maple syrup: naturally sweetens the bars and helps the base stick together choose pure maple syrup for a richer flavor
- Plant based chocolate protein powder: makes every piece extra fudgy and boosts the protein content opt for one with minimal ingredients and no artificial sweeteners
- Rolled oats: provide structure and fiber go for certified gluten free if you need to keep these bars gluten free
- Cocoa powder: amps up the chocolate depth dutch process cocoa will give a darker richer taste
- Chia seeds or ground flaxseeds: help bind everything together and add plant based omega threes
- Dark chocolate: gives the luscious swirl topping look for at least seventy percent cocoa for a glossy finish
- Peanut butter for swirling: should be slightly warm so it is easy to drizzle choose smooth peanut butter for best swirling results
Step by Step Instructions
- Mix the Base:
- In a large mixing bowl combine peanut butter maple syrup protein powder rolled oats cocoa powder and chia or flax seeds Use a sturdy spatula to thoroughly blend everything together until a thick sticky dough forms It should be easy to press and hold its shape
- Press into Pan:
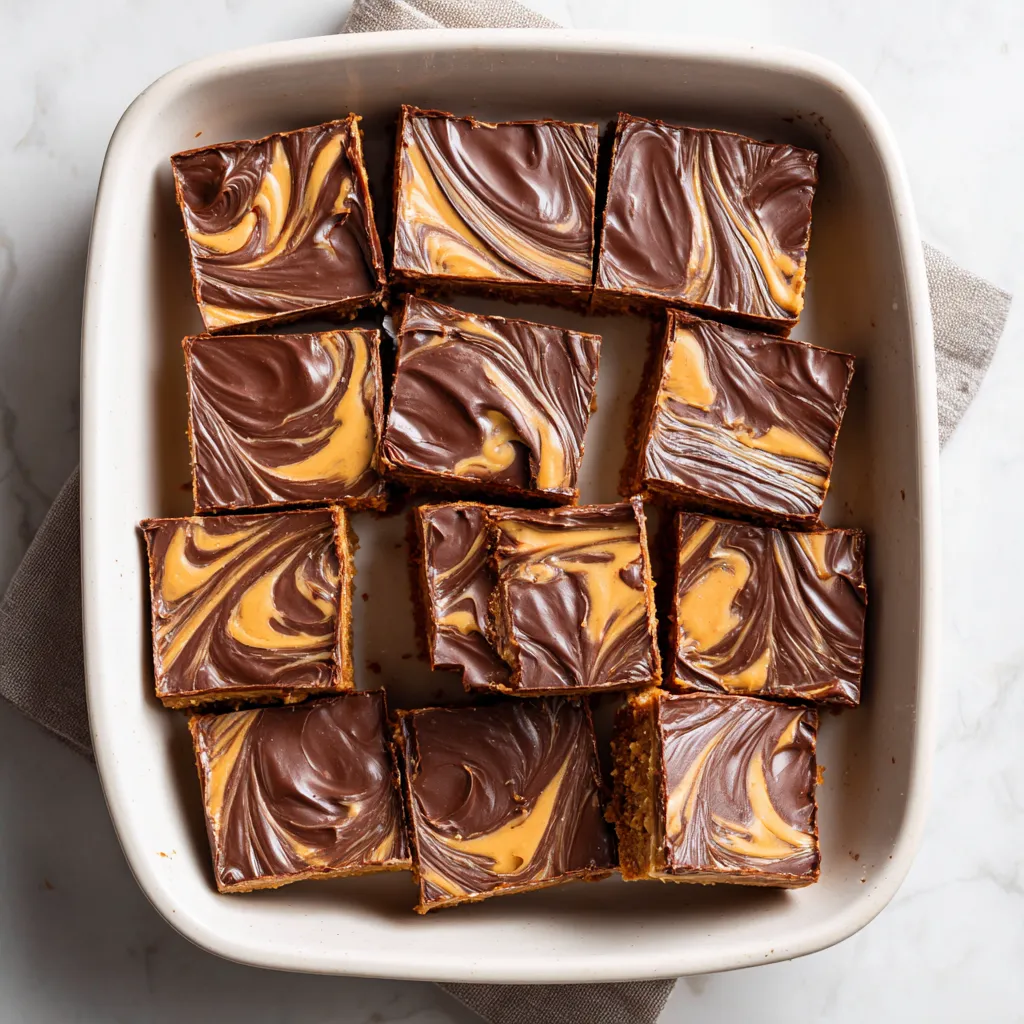
- Line an eight by eight inch square baking pan with parchment paper Spoon the mixture into the pan then press down as firmly and evenly as possible Use the back of a measuring cup to compact it into all corners so your bars are dense and neat
- Pour and Swirl the Topping:
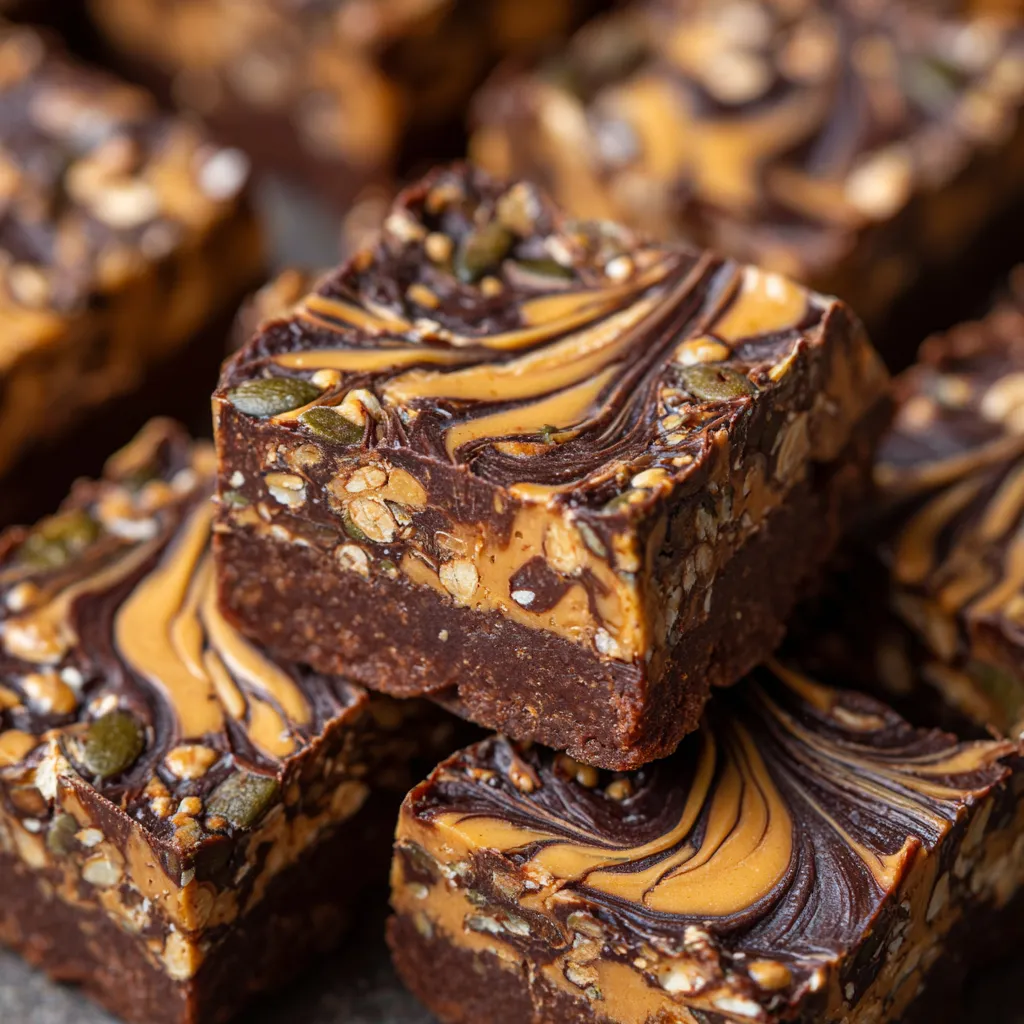
- Pour the melted dark chocolate evenly over the base Use a spatula to smooth and reach every edge While the chocolate is still liquid drizzle the warmed peanut butter in thin lines or dots on top Swirl with a toothpick skewer or even the tip of a sharp knife to create a marbled effect
- Chill Until Firm:
- Move the pan to the fridge and chill for at least two hours You want the chocolate top to set completely and the base to firm up for easy slicing If you are in a rush the freezer will speed this up just check that the bars are solid before cutting
- Slice and Serve:
- Once cold carefully lift the whole slab out using the parchment paper Place on a cutting board and slice into twelve even squares Wipe your knife between slices for the cleanest edges Store in the fridge or freezer depending on your needs
 Save This
My favorite part of these bars is the moment I swirl the peanut butter through melted chocolate Sometimes I let my nephew help and he makes wild patterns all over the top The end result is always unique and beautiful
Storage Tips
These bars stay fresh in an airtight container in the fridge for up to one week If you want to keep them longer they freeze wonderfully Just wrap each square in parchment and stash in a freezer bag They will thaw at room temperature in about twenty minutes perfect for busy mornings or snack time
Ingredient Substitutions
Try almond butter or cashew butter if you want a different flavor profile For nut free bars sunflower seed butter makes a great swap If you do not have chia seeds ground flaxseed works just as well and old fashioned rolled oats can be swapped with quick oats for a slightly softer texture
 Save This
Serving Suggestions
I love having a bar as a midday pick me up alongside an iced coffee or hot tea You can crumble them up over banana nice cream or low sugar yogurt for a crunchy dessert layer Feel free to sprinkle chopped peanuts or cacao nibs on top before chilling for more texture and flavor
Cultural and Historical Context
Protein bars have become a modern staple for athletes busy parents and anyone craving convenience but most store bought options are loaded with additives Homemade bars like these are inspired by the wholesome snacks people have been making for decades using kitchen staples like oats nuts and cocoa This recipe puts a plant based twist on traditional no bake bars to suit today’s tastes
Common Questions
- → How do I make the bars firmer?
Refrigerate the bars for at least 2 hours or longer for a firmer texture. Press the base firmly into the pan before adding the topping.
- → Can I substitute peanut butter?
Yes, use almond butter or sunflower seed butter as an alternative for nut-free or varied flavor options.
- → How long will these bars last?
Store in an airtight container in the fridge for up to a week or freeze for up to two months for longer storage.
- → Are these bars gluten-free?
Use certified gluten-free oats to ensure the bars remain gluten-free and suitable for sensitive eaters.
- → What type of protein powder works best?
Plant-based chocolate protein powder blends well and adds extra flavor, but unflavored or vanilla protein can also be used.
- → How do I get the swirl effect on top?
Drizzle warmed peanut butter over melted chocolate, then use a toothpick or skewer to create a marbled swirl before chilling.